For those that have not seen the original build here is the thread.
I am sure a few of the members are waiting to see what was going to happen to this tank, so here are my plans.
This is going into my sons room, originally was going to do a 40 Breeder until I saw that this was still for sale. Seeing that it has a plywood sump and is a few years old I figured there would be some little fixes that need to happen.
When we were dismantling the tank the cubby that has the draws was extremely tough to get out because the bottom of it was swelling, and we saw that the constant removal of it and the door for the skimmer wore down the seal on the edge of the front of the sump and it had absorb a little bit of water.
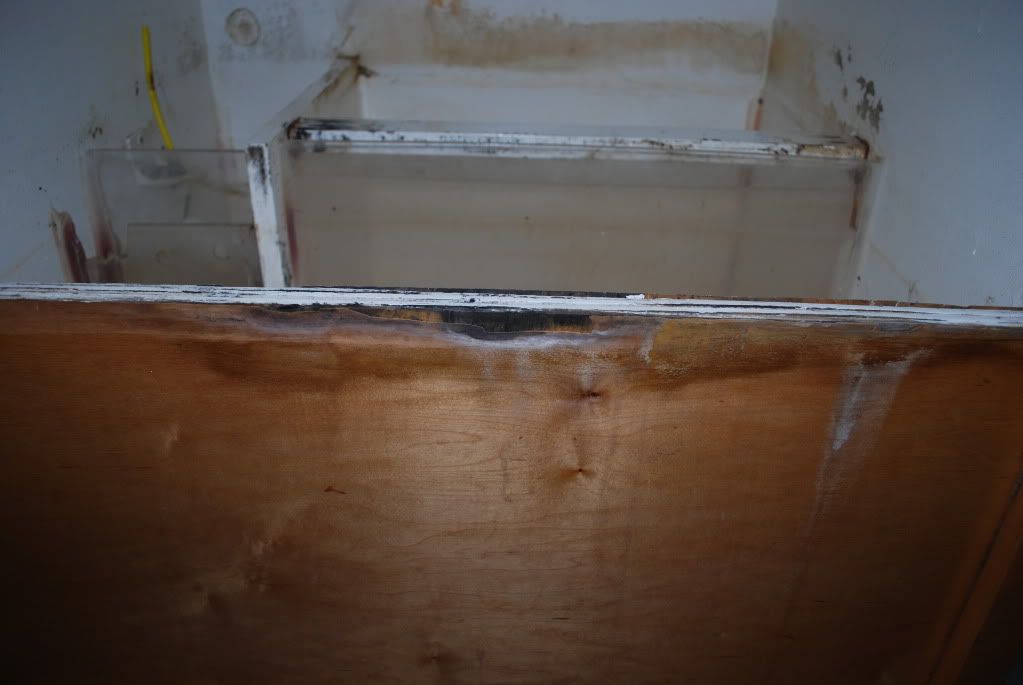
I have been hitting this area with a heat gun for a little bit each night to get as much of the trapped water out before I reseal the edge. Seeing that the removable pieces probably caused this I decided to change that up. I am going to use 2 doors on the top and a false door on the front panel of the sump to try and keep the piece of furniture look of the stand. I already ordered the unfinished maple doors and hoping I will have them by the middle of the week, so I need to find the Zar tung oil that Steve used so I can finish the doors.
The other changes that I have planned is replacing the pumps with a little bit more efficient pumps, the return is a Water Blaster HY-3000 (already have) and the closed loop will be a HY-5000 (on order). The skimmer is a Super Reef 1000, and has been in the tub with the live rock for the last month. I am also planning on adding 2 more holes in the overflow, 1 so I have an emergency overflow and I will run a herbie, the other will be for the closed loop. I will have two more holes in the bottom in the two front corners for the closed loop and on in front of the overflow for the intake of the CL. I see that if I leave the CL pump in the overflow the likelihood that I would do maintenance on the pump would be highly unlikely.
So this is the plan, so far I have cleaned it up and started to repair the front panel. Hoping to have the tank and stand drilled this weekend, and do some rough plumbing.
I am sure a few of the members are waiting to see what was going to happen to this tank, so here are my plans.
This is going into my sons room, originally was going to do a 40 Breeder until I saw that this was still for sale. Seeing that it has a plywood sump and is a few years old I figured there would be some little fixes that need to happen.
When we were dismantling the tank the cubby that has the draws was extremely tough to get out because the bottom of it was swelling, and we saw that the constant removal of it and the door for the skimmer wore down the seal on the edge of the front of the sump and it had absorb a little bit of water.
I have been hitting this area with a heat gun for a little bit each night to get as much of the trapped water out before I reseal the edge. Seeing that the removable pieces probably caused this I decided to change that up. I am going to use 2 doors on the top and a false door on the front panel of the sump to try and keep the piece of furniture look of the stand. I already ordered the unfinished maple doors and hoping I will have them by the middle of the week, so I need to find the Zar tung oil that Steve used so I can finish the doors.
The other changes that I have planned is replacing the pumps with a little bit more efficient pumps, the return is a Water Blaster HY-3000 (already have) and the closed loop will be a HY-5000 (on order). The skimmer is a Super Reef 1000, and has been in the tub with the live rock for the last month. I am also planning on adding 2 more holes in the overflow, 1 so I have an emergency overflow and I will run a herbie, the other will be for the closed loop. I will have two more holes in the bottom in the two front corners for the closed loop and on in front of the overflow for the intake of the CL. I see that if I leave the CL pump in the overflow the likelihood that I would do maintenance on the pump would be highly unlikely.
So this is the plan, so far I have cleaned it up and started to repair the front panel. Hoping to have the tank and stand drilled this weekend, and do some rough plumbing.
")