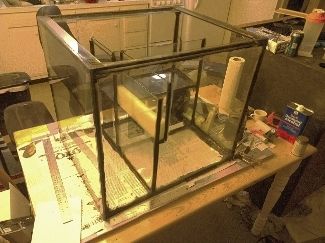
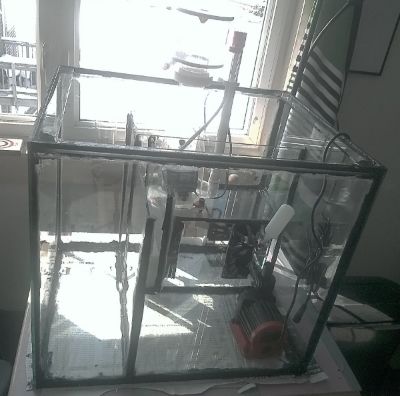
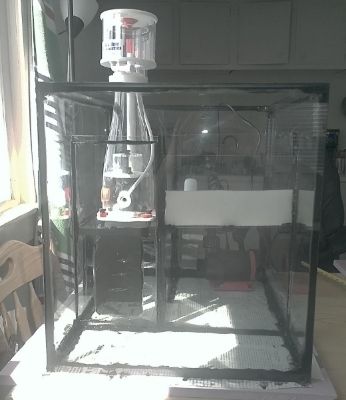
Whelp, I pulled the trigger and bought a deep blue cube. Picked it up last Thursday. A new shop in Gorham, ME called Easy Aquariums hooked it up. I've been aquiring equipment and knowledge over the past few months or longer (so it might seem) and this weekend I got going with the stand. I'll be building my own sump from scratch out of glass as well.
The stand is made from: poplar, poplar ply, red oak and red oak ply. Im sure i could have gotten away with using pine instead of poplar. But from what i've read poplar is very moisture resistant and it doesnt warp/shrink/swell very much at all over time. So I said what the hell why not. All 3/4. I used some kind of "waterproof" wood glue on all connections. As well as 100 wood screws. 100 pocket screws. And more, not sure how much more but i emptied the 2 100's. With all honesty carpentry doesn't come to me naturally. The progress ive made took about 18 hours and im not close to done.
pocket screw jig. Shockingly simple to use. Unless of course you get tired and don't clamp it down tight enough. Which i did once. Really friggen pissed me off but oh well.
http://i256.photobucket.com/albums/hh165/Sokretys/IMAG0358_zps54984191.jpg
poplar frame w poplar ply on back, top and bottom. The "stand" on the left and right will hold a 3.5 gallon RO resevoir on each side.
http://i256.photobucket.com/albums/hh165/Sokretys/IMAG03591_zps30d9b8da.jpg
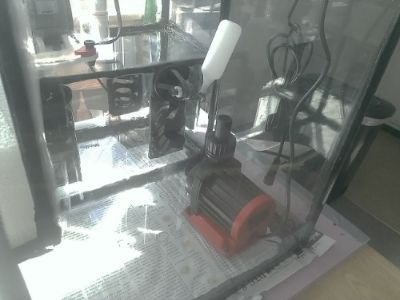
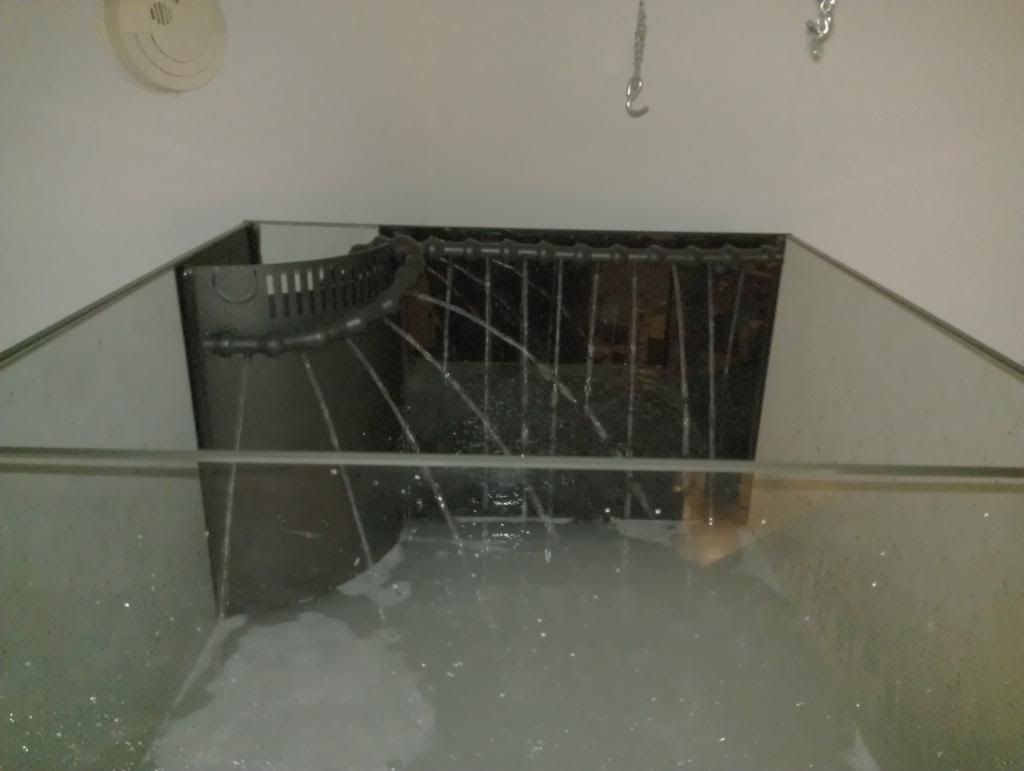
Here you can see my pocket screw mistake on the back left. The hole was drilled too close to the edge...But ill be filling in those holes with wooden plugs as i did with all of the others. I will be painting the entire inside with epoxy floor paint. I doubt anyone will be able to notice it after painting but I will know haha I also used ge silicone 2 on all of the seems in there. Sloppy but functional
http://i256.photobucket.com/albums/hh165/Sokretys/IMAG0361_zps70407630.jpg
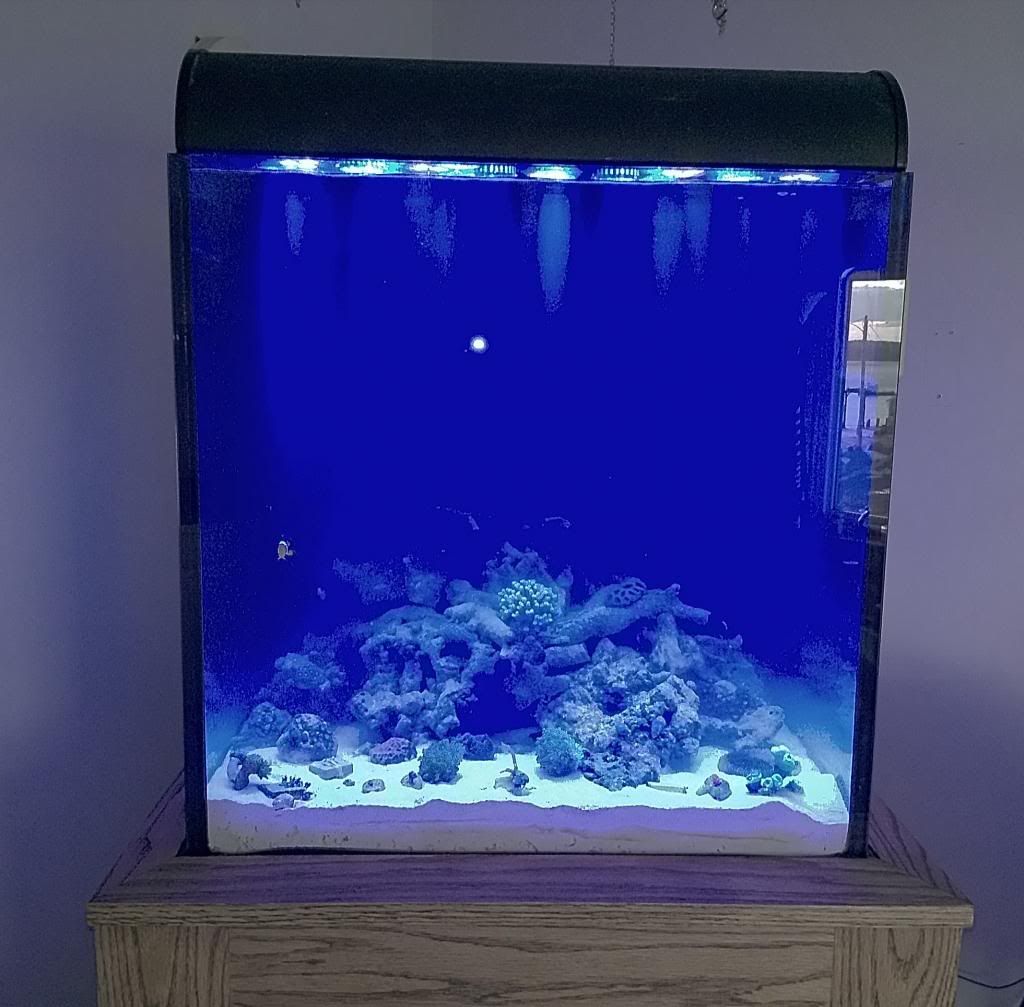
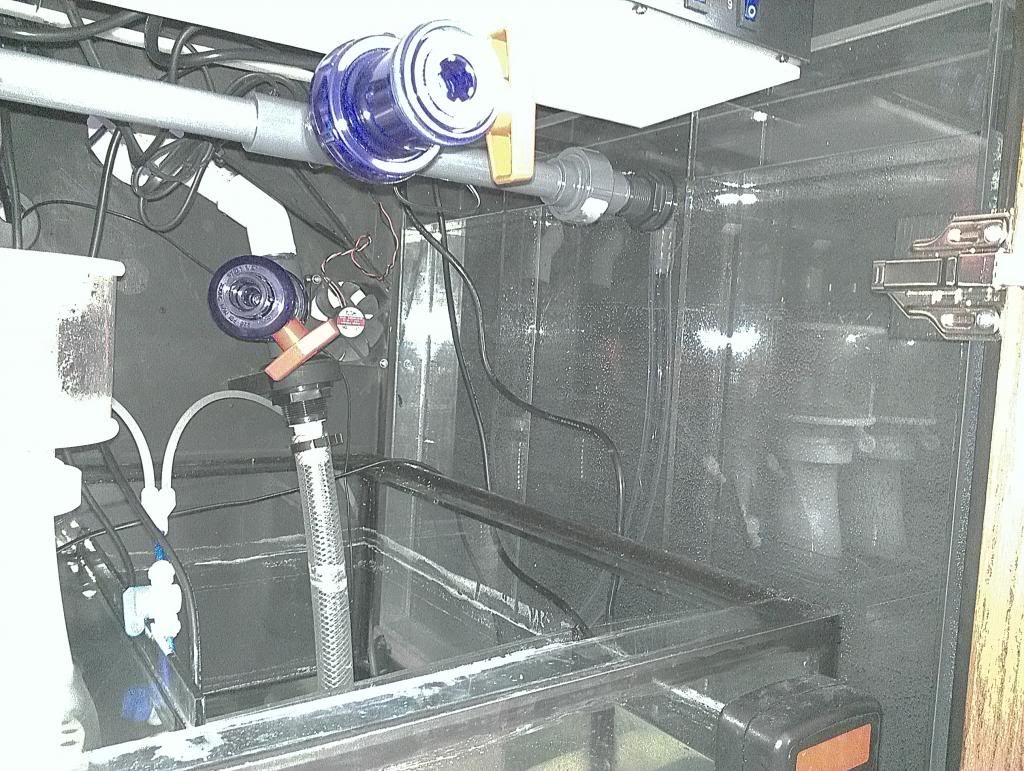
Here is how i just left it for the weekend. The cube will sit on top of 3/4 foam and the black rim on the bottom of the tank will be flush with the oak trim. The top will be 2" of oak on the left and right. As well as 4" in the front. The stand is 44.25" tall. It was supposed to be 42 but I had a wicked brain fart when sizing the poplar uprights-forgot about factoring in the recessed top to the equation. Whatever-it will still work just fine. And i was a bit concerned with the limited space for plumbing above a sump that is 21" tall. Should be much easier now haha
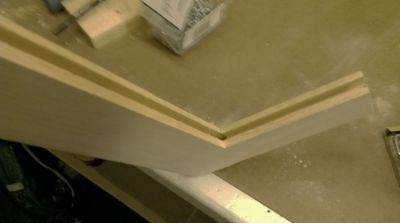
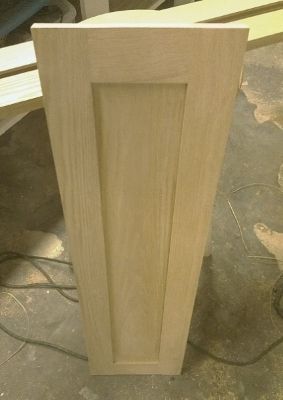
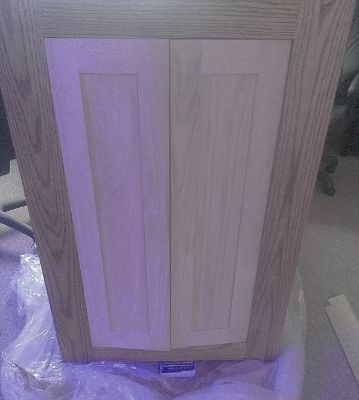
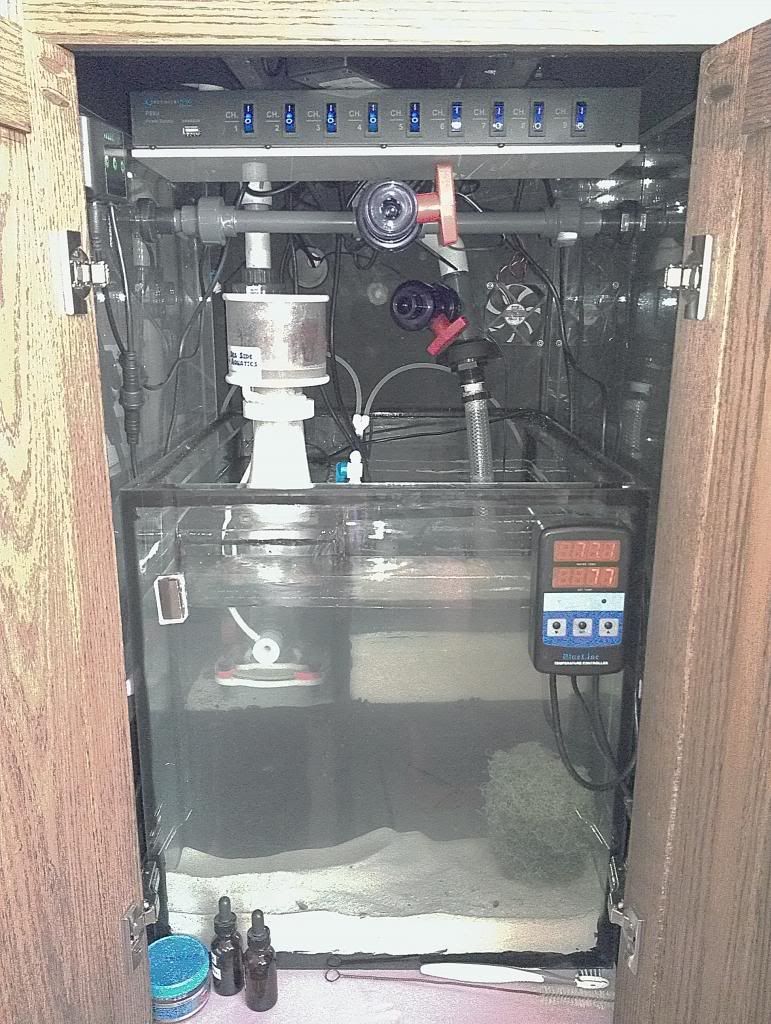
The front will be a solid oak rectangle. Not sure at all what im going to do about the doors. I may outsource those haha
http://i256.photobucket.com/albums/hh165/Sokretys/IMAG0360_zps4fd7e5fb.jpg
The stand is made from: poplar, poplar ply, red oak and red oak ply. Im sure i could have gotten away with using pine instead of poplar. But from what i've read poplar is very moisture resistant and it doesnt warp/shrink/swell very much at all over time. So I said what the hell why not. All 3/4. I used some kind of "waterproof" wood glue on all connections. As well as 100 wood screws. 100 pocket screws. And more, not sure how much more but i emptied the 2 100's. With all honesty carpentry doesn't come to me naturally. The progress ive made took about 18 hours and im not close to done.
pocket screw jig. Shockingly simple to use. Unless of course you get tired and don't clamp it down tight enough. Which i did once. Really friggen pissed me off but oh well.
http://i256.photobucket.com/albums/hh165/Sokretys/IMAG0358_zps54984191.jpg
poplar frame w poplar ply on back, top and bottom. The "stand" on the left and right will hold a 3.5 gallon RO resevoir on each side.
http://i256.photobucket.com/albums/hh165/Sokretys/IMAG03591_zps30d9b8da.jpg
Here you can see my pocket screw mistake on the back left. The hole was drilled too close to the edge...But ill be filling in those holes with wooden plugs as i did with all of the others. I will be painting the entire inside with epoxy floor paint. I doubt anyone will be able to notice it after painting but I will know haha I also used ge silicone 2 on all of the seems in there. Sloppy but functional
http://i256.photobucket.com/albums/hh165/Sokretys/IMAG0361_zps70407630.jpg
Here is how i just left it for the weekend. The cube will sit on top of 3/4 foam and the black rim on the bottom of the tank will be flush with the oak trim. The top will be 2" of oak on the left and right. As well as 4" in the front. The stand is 44.25" tall. It was supposed to be 42 but I had a wicked brain fart when sizing the poplar uprights-forgot about factoring in the recessed top to the equation. Whatever-it will still work just fine. And i was a bit concerned with the limited space for plumbing above a sump that is 21" tall. Should be much easier now haha
The front will be a solid oak rectangle. Not sure at all what im going to do about the doors. I may outsource those haha
http://i256.photobucket.com/albums/hh165/Sokretys/IMAG0360_zps4fd7e5fb.jpg

")