20 Gallon Long Frag Tank Build

Frag Freaks

Well-Known Member
BRS Sponsor
BRS Member
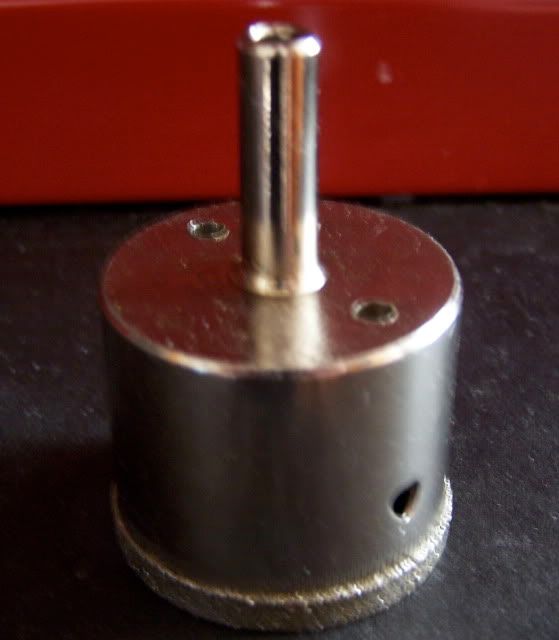
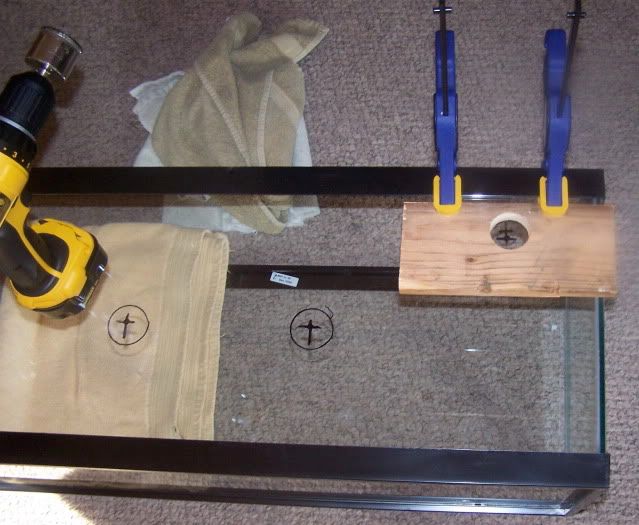
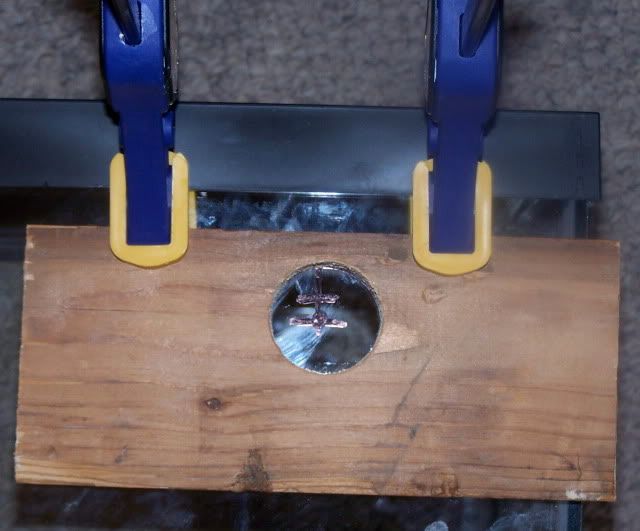
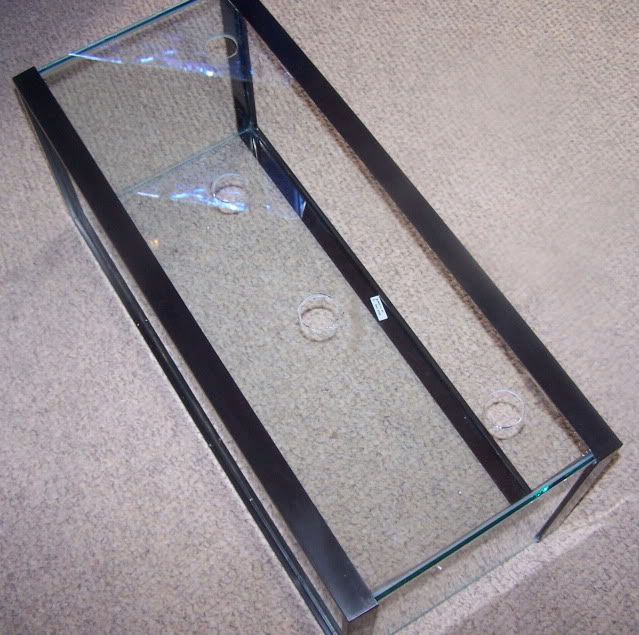
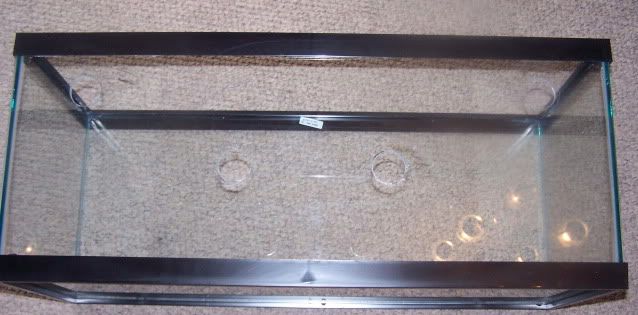
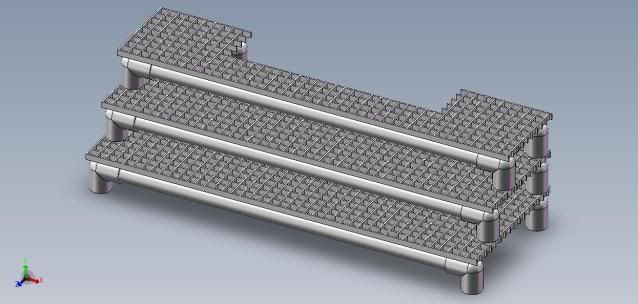
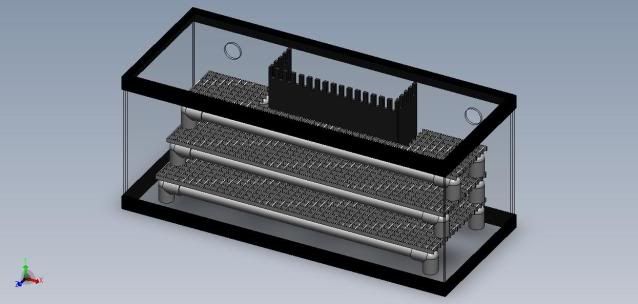
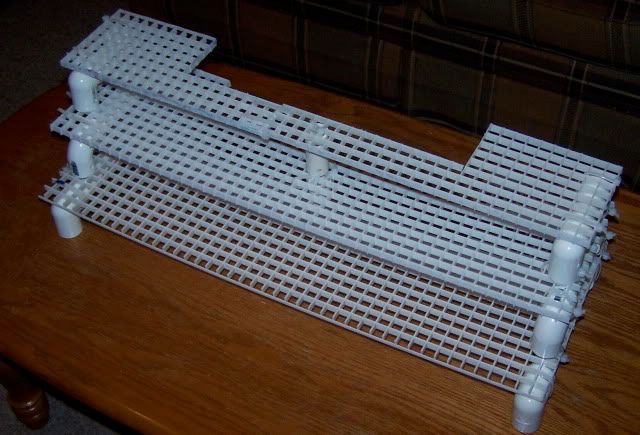
I guess I can finally start a tank build thread since I have begun. This thread could come to an abrupt end though if I do not succeed in drilling my first tank.

I have had some stuff laying around my house and I decided to take a shot at building some sort of frag tank, whether its just temporary to prove I can drill a tank or a permanent solution, I have no yet decided. I am trying to keep the budget as far down as possible. I am looking to house just lower demanding corals at first such as Softies, LPS, and zoas.

I have decided I am going to go with a 150w HQI metal halide. After research and price comparison, it would just cost too much to repair my IceCap 660 and buy all the proper reflectors and endcaps along with bulbs. I am going to go with an Aquatraders 150w Metal Halide Pendant. I know they haven't had too much of a good rep in the past but as of late it seems that they have improved their quality. At $99 for the unit, I can upgrade the bulb and still be at half the cost it would be for me to go down my initial plan of T5s.

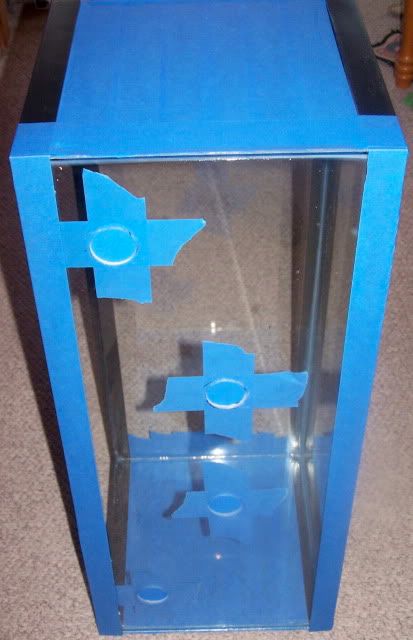
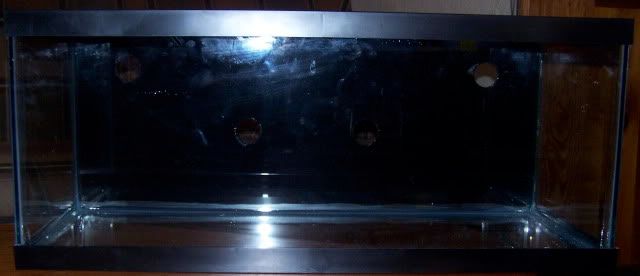
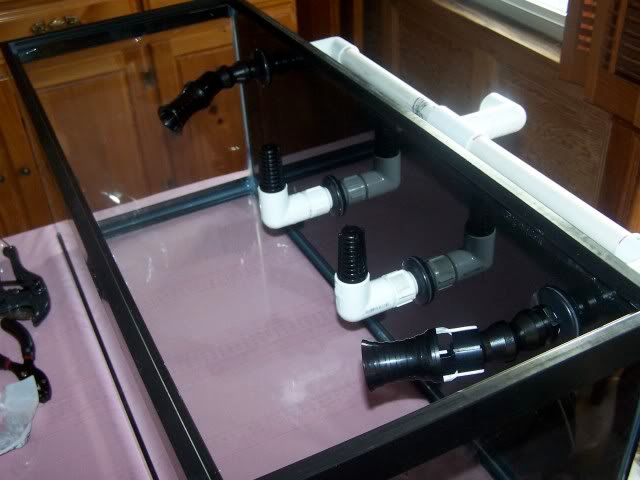
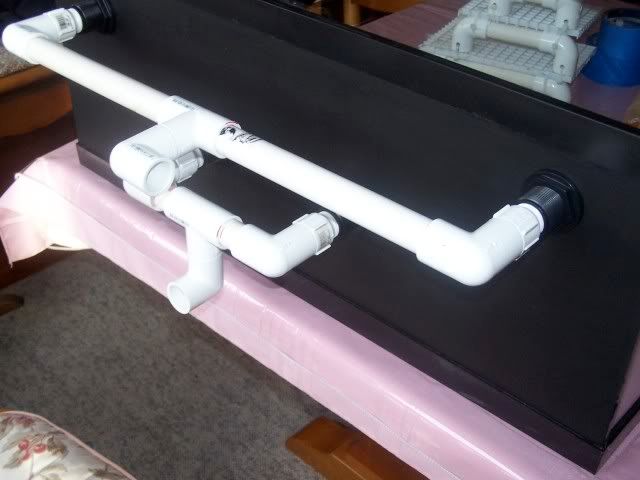
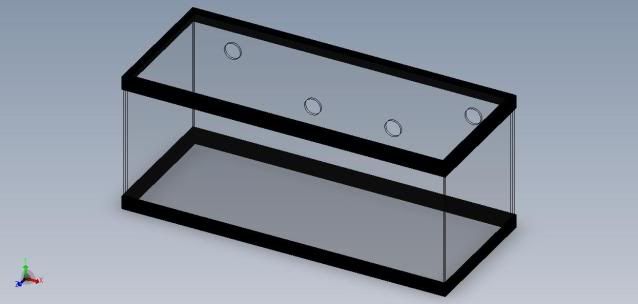
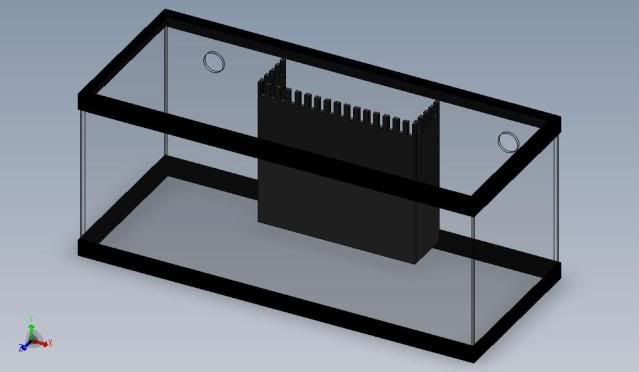
For flow I have decided to go with a closed loop system so I can maximize the space inside my tank to house the corals. I have an extra Mag 3 pump laying around that all it needs is a new impeller. The closed loop system would consist of two outlets and 2 inlets, with the outlets being hid by a custom overflow box and the inlets using two penductors to increase flow. The two outlets and inlets leave me the option to either add a sump at a later time when I decide to house more demanding SPS corals or plumb a protein skimmer in.

So with that I will not be running a protein skimmer, I will just do about 5 gallon water changes every couple weeks or so, but I want to keep the nutrients in the tank on the higher side.

So here we go and hopefully I can make it all the way to the end on this one.
 
The Design

Here is just some preliminary designs for the frag tank. I already changed the design of the frag rack to save cost but using less PVC Elbows and piping. I will be trying to do this as I go along. The design is just to give me some type of basis to work off of.

Hole Locations:
Frag_Tank.jpg


Custom Overflow Box:
Frag_Tank_2.jpg


Initial Frag Rack Design:
Frag_Rack.jpg


Possible Final Frag Tank Outcome:
Frag_Tank_3.jpg
 
Finished Frag Rack

So I had some extra time today and I worked on the frag rack. I used leftover eggcrate that I had sitting around for the longest time. I was also given about 4 5 foot pieces of 3/4" PVC that my father had laying up in the attic.

I changed the original design by removing the front PVC tubing since I could use the extra PVC for the closed loop plumbing and also it would restrict frag plugs from sitting all the way through the eggcrate.

I used just some side supports instead with a piece of PVC in the middle to keep the rack from bowing in. By doing this i shaved off an extra 6 elbows and and about 5 feet of PVC tubing. I fell a little short on 26" length eggcrate so I had to make the top level of the frag rack into two sections in order to complete the rack without having to go out and buy any extra materials.

Frag Rack:
100_2593.jpg


Next step is to drill the tank which will be done as soon as my 1.5" Diamond hole saw arrives. I hope to get the tank drilled (successfully) by next week and to order some of my plumbing and to be able to paint the back of the tank black.

Tank Hole Locations Laid Out:
100_2591.jpg
 
Love the frag rack. Keep up the good work.
If only I could find a tank small enough to fit under my 55 I would love do do that.
Space is very limited.
 
Love the frag rack. Keep up the good work.
If only I could find a tank small enough to fit under my 55 I would love do do that.
Space is very limited.

I know what you mean. I would love to have plumbed this into my main tank but instead it will be ran separately in another room.
 
I Have had 2 ten gallon tanks in the stand of a 55...The cheap fake wood stand.... ---For Rone
This is a awesome build how much egg crate did you really use is my question? Meaning how much should i buy for my 15 frag tank i am tyining in to my main tank...
 
Last edited:
errr i might be wrong, but i think a BRS member recently found that most 20 gallon tanks for standard manufacturers are tempered on the side panels? Might be recalling wrong.. but it's worth double checking if you haven't already.
 
errr i might be wrong, but i think a BRS member recently found that most 20 gallon tanks for standard manufacturers are tempered on the side panels? Might be recalling wrong.. but it's worth double checking if you haven't already.

I did my 20L on the side, no problems. The glass is very thin and you need to go slow.
 
I Have had 2 ten gallon tanks in the stand of a 55...The cheap fake wood stand.... ---For Rone
This is a awesome build how much egg crate did you really use is my question? Meaning how much should i buy for my 15 frag tank i am tyining in to my main tank...

Bottom Level - 26" x 9"
Mid Level - 26" x 7"
Top Level - 26 x 5"

Overall use of eggcrate - 26" x 21". The height from the bottom of the 3/4" elbow to the top level is approx 8".
I am not sure on how big they sell the sheets in since I already had mine laying around, which resulted in having to make the top level into two sections.

I left approx. 2" of space on either side of the rack to the side glass panes and then approx 1.5" of space on either side of the rack from the front and back panes.

So if my research is right, your tank dimensions are 24.25" x 12.5" x 12.75. I believe your tank is the same width and height as mine, unless you have 15G High. If you wanted to make the frag rack the same as mine and allowing for the same space between the side panes and then the front and rear panes your levels would look like the following:

Bottom Level - 20" x 9"
Mid Level - 20" x 7"
Top Level - 20" x 5"

Overall eggcrate use of 20" x 21". This would give you approx. the same space all around the frag rack to the glass as mine.
So basically a 24" x 24" sheet would be enough for you to make the rack without making an mistakes.

Oh, great looking build though.. very good use of space for a 20 gallon! :)

Thank you, I wanted to leave as much space as possible to optimize the number of frags that I could fit in there. The small height of the tank will also allow me to keep the higher light corals closer to the surface so that they can obtain as much light as possible.

I did my 20L on the side, no problems. The glass is very thin and you need to go slow.

Glad to hear that, I was starting to get a little nervous that my build would be stopped dead in its tracks.
 
Drill Bit Arrived

So it's now time where it's going to be do or die for this frag tank build. If I fail here then the build will be all over.

1.5" Diamond Hole Saw:
100_2601.jpg


I purchased the saw from Glass Holes. Since there is no centering bit on these cutters I plan on making a jig so that when I start to cut the bit wont start to "walk" on me.

To do this I am going to drill a 1.5" hole in a piece of wood. I will then mark out my hole on the back of the tank and clamp the drilled piece of wood into place where I want the hole. I would then use the hole to hold a water bath for cutting and also for keeping the diamond hole saw from moving.

As soon as I get a chance to do this I will post some pictures, perhaps some spare time tonight would at least give me time to make the jig. I have to keep my fingers crossed and hopefully I have success in drilling my first tank.
 
When I drilled some 20g H's a few years ago, I did it free hand with no problem. If you use a jig, it makes cooling the glass a bit more work. The drill won't walk as much as you think. Just go slow. What keeps it from walking I believe is the fact that you aren't applying much pressure. Atfirst it's really only scoring the surface, and then after a while it creates a groove that will keep the diamond hole saw in the same place. I've only done 3 tanks in my life, and I thought it was alot easier than expected. Just make sure to make a wall with plummers puddy and keep putting cool water in there to cool the glass. The puddy is in the plumbing section of lowes/HD and it only costs a couple dollars for a small tub.
 
Go slow

I also drilled a 20L. I used plumbers putty to build a dam around the area to drill and filled with vegetable oil. GO SLOW.
 
Tank Drilling

So the my first attempt at drilling a tank was a success! Like I mentioned previously, I made a 1.5" jig for my tank drilling so the bit would not walk on me. What I ended up doing was just using the jig to score the surface. After I achieved this I then removed the jig and made a dam with plumber's putty so that I could drill in a water bath. I took my time and let the drill do all of the work.

The Jig:
100_2604.jpg

100_2605.jpg


Plumber's Putty Dam:
100_2606.jpg
 
Drilled Tank

Here is the finished product after the tank drilling process.

Drilled Tank:
100_2608.jpg

100_2609.jpg
 
So the next step is to paint the back of the tank. I have taped off the tank and will get a chance to give the back a couple coats of Black Latex Enamel.
Also in the meantime I have placed and order for some bulkheads, strainers, and flow eductors.

Ready for Paint:
100_2610.jpg
 
Background Painted

So I got a chance to paint the back of the tank over the weekend. I did three coats using a Black Latex Enamel and a foam brush. I am still waiting on some bulkheads, strainers, and eductors. After I get some of the plumbing in this week, I can layout the rest of the plumbing for the closed loop system.

Painted Tank:
100_2617.jpg
 
I started to mock up some of the plumbing. I originally planned to just run the plumbing straight back and mount the pump in the rear center, but because I want to save some space I am going to now run some of the piping off to the side.

I also had a chance to mock up the inlets and the outlets inside the tank:

Inlets and Outlets:
100_2619.jpg


Plumbing Mock Up (So Far):
100_2620.jpg
 
Upcoming Events

April 21, 2024
Paul B
Club Meeting

Back
Top