20G Long Sump/Refugium Built under my 72G Bowfront reef tank

higorc

Call me IGOR :)
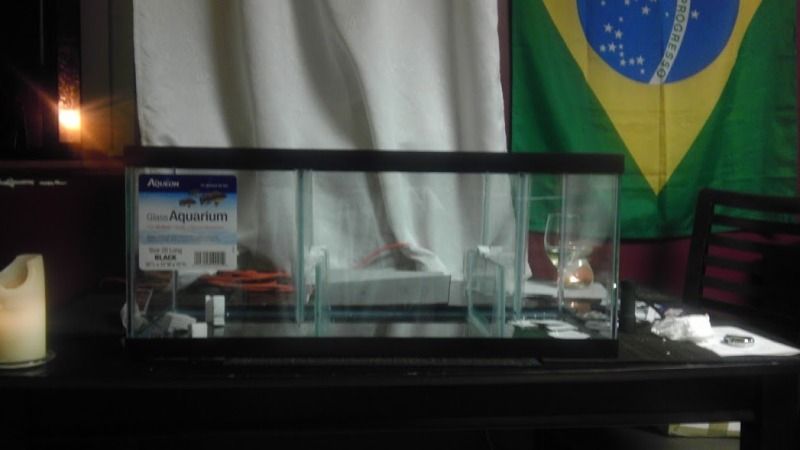
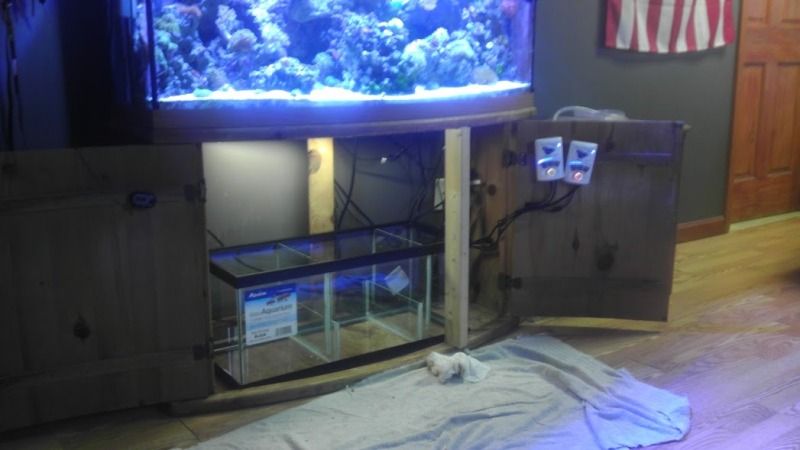
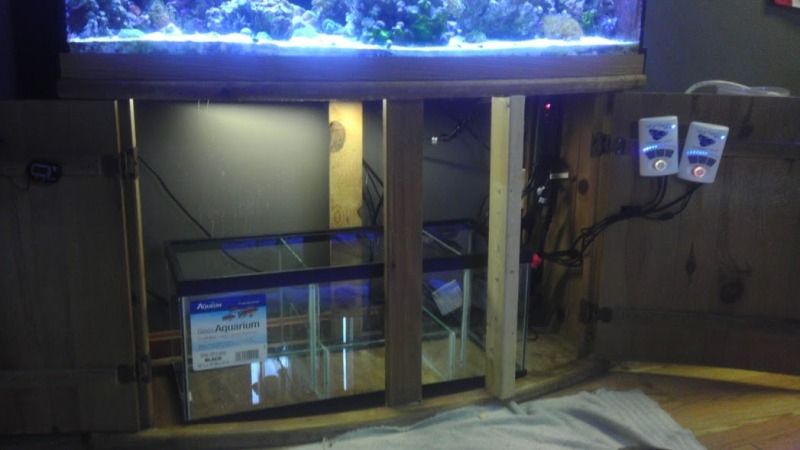
I have been thinking of doing this for a while now but never had the time to do it. This week I just bit the bullet and did it. I took advantage of the $1 per gallon at Petco and got a 20G long which I decided was the best fit/option to go inside the tank stand.

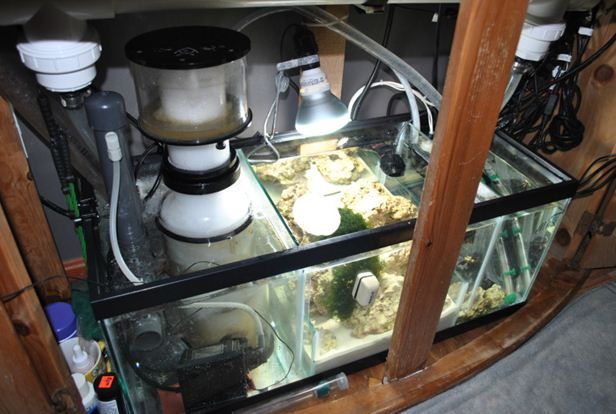
I have had a Wet/Dry filter converted into a sump/fuge for 6 months now and it worked great but I needed more space and better baffle configuraration.

oldsump.jpg


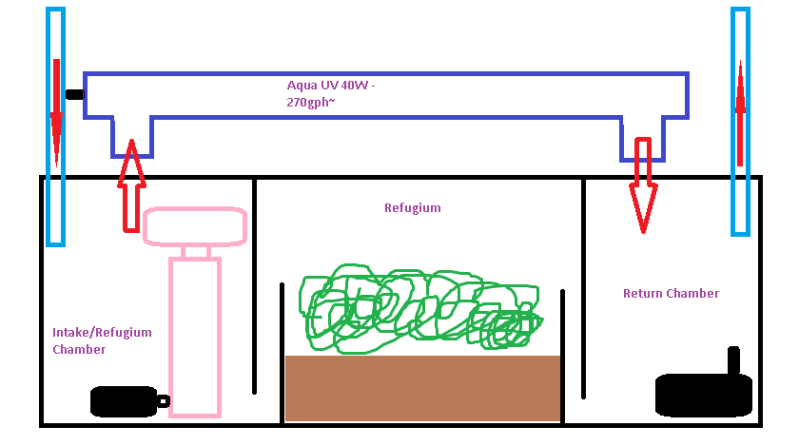
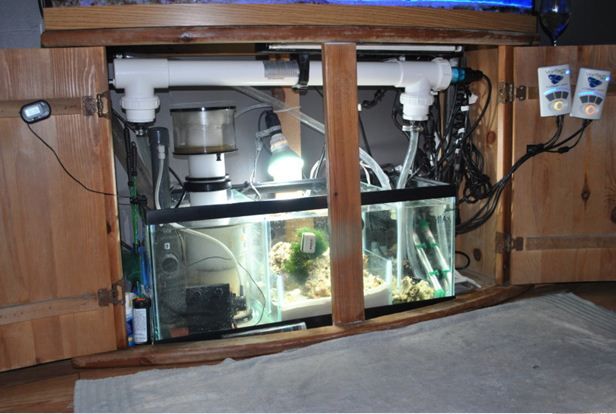
I did a ton of research and looked at a lot of sump/Refugium designs and came up with this:


MySump-FugeandUVplans.png


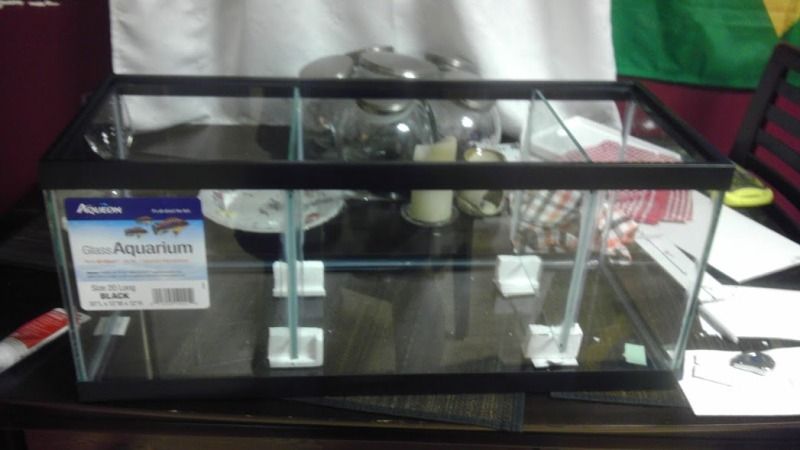
I went to a local Glass/Mirror and had them cut 4 pieces of ¼ inch glass to use as baffles got Silicone without mold inhibitor at Home Depot and went to work! (0;
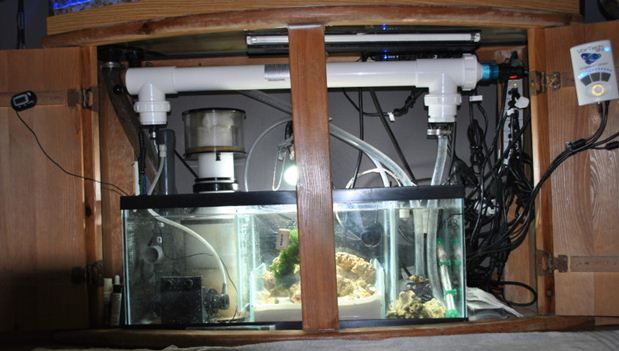
First baffles to get siliconed in were the 2 long ones. I held them in place until the silicone set by propping them up with Styrofoam.

sump-longbaffleinstall.jpg


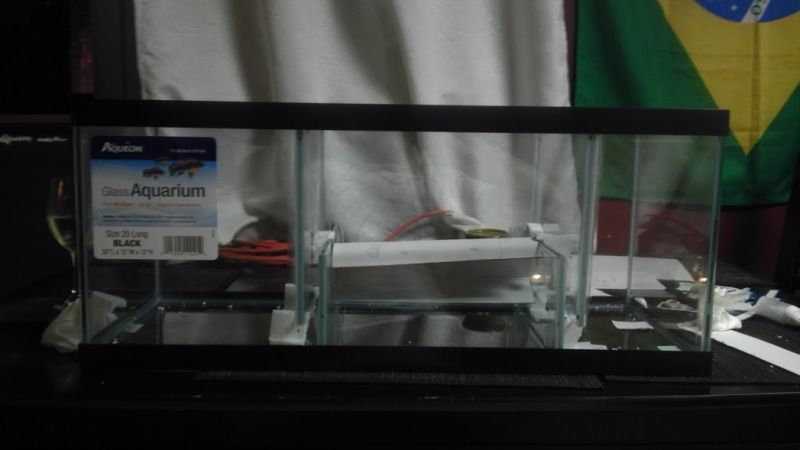
I then did the 2 shorter baffles that would hold my deep sand bed and form my Refugium.

sump-shortbaffleinstall.jpg


sump-shortbaffleinstall2.jpg
 
With all 4 baffles installed, it should act as bubble traps and keep any microbubbles. I didn’t see the need for a third baffle after the Skimmer since the return chamber is at the other end after my refugium, which is pretty long. Unless the Bubbles learn to dive again to go under my last set of baffles, it should work as planned. (o;


sumpbaffleinstall-finish.jpg


A few reasons why I designed it this way;

• DT (Display Tank) water goes into the first/skimmer chamber and creates a lot of micro bubbles. Add that to the bubbles from the skimmer and that’s a lot of bubbles. By putting the return chamber at the opposite end it gives the bubbles enough time to dissipate.
• I put the Refugium in the middle and made it as long as possible so I can use it as a “Frag Tank” and to get rid of bubbles before they reach the third/return chamber.
• I also installed a 40W Aqua UV Sterilizer drawing water from the Skimmer Chamber and dumping it on the return chamber. By putting the Refugium in the middle it keeps all the pods/plankton from being killed/zapped by the UV. It lets them get to the return chamber and to the DT still alive.
After I installed all 4 baffles, I let it cure overnight and tested it for leaks the next day.
After that came the part I was most afraid of…getting it to fit in the stand! I had to remove the front center bracket of the stand in order to get the sump inside.


standcenterbracketoff.jpg


Even though I read it’s doable and it doesn’t look like it’s nowhere near possible for it to support the weight of the tank, I couldn’t help but to sweat bullets when I took it off. I kept imagining the whole tank toppling over!!! Just as an extra measure I cut a 2x4 to length and put it in the front of the stand. I got the sump in the stand and the bracket back as fast as I could… Very nervous few minutes…


standcenterbracketon.jpg
 
I got everything back in the sump and started all the equipment back up again and everything looked perfect. No noise (which was one of my biggest fear), everything fit perfectly and I love how it looks! Very clean. It makes you feel good when you do something and comes out better than you thought it would.


sump-side.jpg


sump-top.jpg


sump-front.jpg


Now I have to figure out some kind of "wire-management". A way to hide the power cords... But's that's for later. I am still recovering from building the sump, planning and installing it and my new Aqua UV. I worked on the tank from 9AM until 7PM. Non stop...

Thanks
Higor
 
Looks awesome. I'm still trying to figure what to do with all my wires underneath.

Sent from my Nexus S 4G using Tapatalk 2
 
In post 3, was that tank running or did you have the return pump off? The water level in the sump looks awful high with no room for the water in the plumbing or if the tank siphons back when power goes out to the return pump. I just don't want you to have a flood.
 
In post 3, was that tank running or did you have the return pump off? The water level in the sump looks awful high with no room for the water in the plumbing or if the tank siphons back when power goes out to the return pump. I just don't want you to have a flood.

You r right. It is high. It is above my desired/confortable estipulated "Max Level" but not enough to flood even if all my pumps fail. It would just make it so there is no flood.

It went over the "Max Level when I was still adjusting things and I accidently bumped the ATO float and made it pump RO water to the system. I hadn't secured the floats yet so they moved turning on the pump.

I secured the ATO floats but didn't mind to correct the water level in the sump. I know water evaporation will make short work of the water above the water level limit.

On my 72G bowfront tank there is about 1 - 1.5 gallons of "overflow" water once the return pump is off. I checked it against the sump and went double that to allow for errors/mistake.

This is where it's after 22 hours;

waterlevel.jpg


Thanks for noticing that though. This is why I like sharing things with people here in the club. A lot of times you might catch on something I might have overlooked! (o;

Higor
 
Looks good, nice clean work on the baffles.

How much flow are you actually running through the sump? I also notice that you only have a couple of gallons space to spare when the power goes out. You have tested it, right? :) Edit, re-read your last post, yes you did test it :)

Also you might want to think twice about that metal hose clamp on the mag, it's already rusting. Not all "stainless" is created equal...
 
Also you might want to think twice about that metal hose clamp on the mag, it's already rusting. Not all "stainless" is created equal...


I was wondering the same thing. Where do I get plastic or stainless clamps?

I have a Mag 7 as return. So roughly 630-650GPH.


Higor's EVO 3D
 
Looks good, nice clean work on the baffles.

How much flow are you actually running through the sump? I also notice that you only have a couple of gallons space to spare when the power goes out. You have tested it, right? :)

I did. It's about double the water amount that comes from the overflow...

It looks close. But even if all the pumps fail I still have space to play with... :)

Higor's EVO 3D
 
how hard was it to remove the center brace?

Ive been wanting to pull my sump out like that, but dont trust myseld to remove the brace. How did you re-secure it?
 
did this work out good for you ...........im in the process of the same thing just with a 90 gallon tank instead ............lmk please i got 2 bafles in already
 
I have had no issues with it besides wishing it was bigger!!! :) Sometimes my Skimmer will go a little crazy when I am feeding and throw out Micro Bubbles, but none gets to my DT.

The only thing I wish I had done differently was making the baffles a little closer/narrower to each other. The only reason for this is so I coud isolate live stock in my Fuge (for a day or 2 when needed) and not be worried about it crawling/swimming through the baffles and getting sucked into one of the pumps.

This should not be an issue if u cut the baffles with enough of a gap to silicone it in place. U only need to squeezy the Silicone in through one side of the baffles if u get enough in there. Not both.

Hope this helps
Higor
 
ok i understand ......i went with a guess but i measured the baffles at 5 inches tall and 11and 11/ 16ths and the other at 10 inches tall and 11and 11/16s

you were indicating to put the small baffles closer to the big ones so nothing get threw ?


i have a mag 9.5 is that good for this sump i already glued in two baffles
 
Exactly! I have a 1" gap between the short and long baffles. I would do 3/4" space instead of 1" if I was to do it again.

I had the baffles cut to the same dimensions as u. I cut the long one at 10" and the short one 5" with both 11"-11/16 side ways. That should give u enough of a gap to squeezy the silicone through the side of the baffle.

Just make sure you see a solid silicone contact between the baffle and the tank. Make sure there is little to none air bubbles.
 
Back
Top