FINALLY! The unveiling of Turtletrax's 4 Gallon Pico Reef tank build!

Skeeter7424

More corals than gallons
So if anyone has been around us...or read her posts the past two months, we have been building a 4 gallon pico reef tank in our bedroom for her. If you haven't heard about it, first crawl out from under your rock :p and here's the build specs...
-Finnex 4 gallon pico tank
-Finnex canister filter running carbon
-Pico powerhead
-Deep Blue Heat Stick heater
-Custom one piece stand and hood
-Homemade 9 CREE LED (5 cool white, 4 royal blue) dimmable light setup (more details later)
-DIY potentiometer driver dimmer

I'm going to post the pics step by step, so if you see this before the final shots, just wait to post...

The unwrapping
Fishy%20Fish%20152.jpg


Fishy%20Fish%20153.jpg


Light, bulb, filter, and tank all in that little box eh...
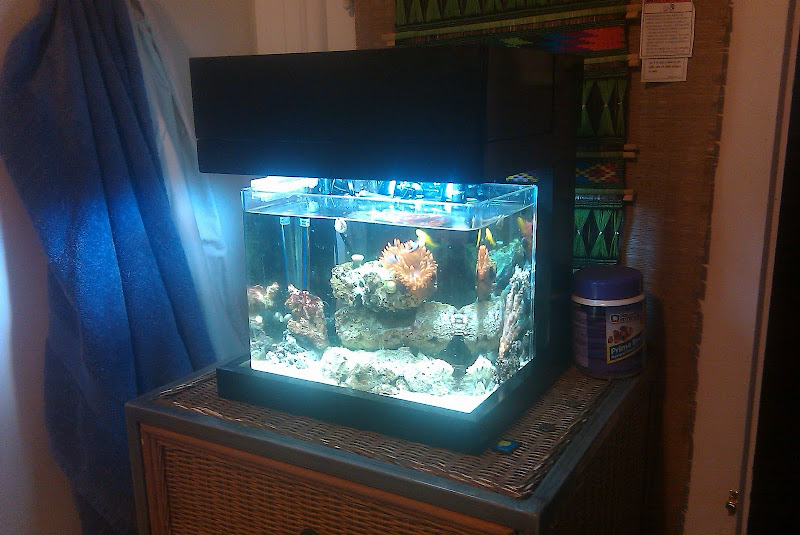
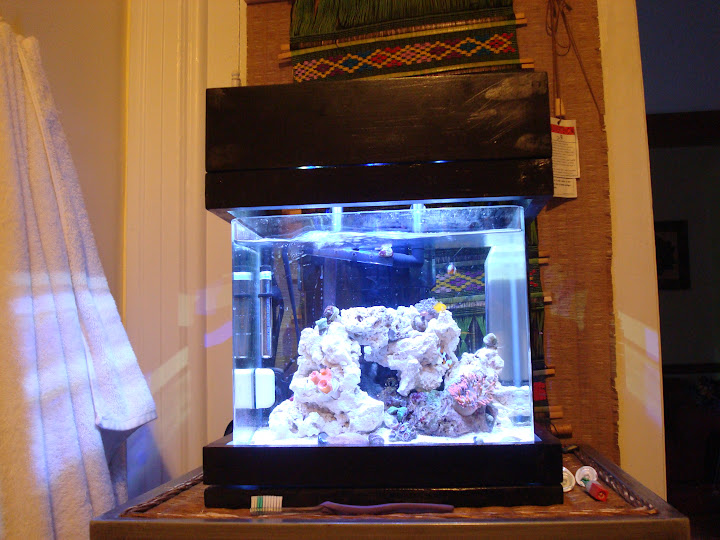
Fishy%20Fish%20154.jpg


In its location...
Fishy%20Fish%20156.jpg
 
And so the cycle begins

Fishy%20Fish%20158.jpg


Fishy%20Fish%20161.jpg


Three weeks after the start, all levels at zero, time for some stuff...

Fishy%20Fish%20163.jpg


Fishy%20Fish%20164.jpg


Two baby Picasso clownfish, and a beautiful RBTA from Frank180Reef..

And the moonlights on

Fishy%20Fish%20162.jpg
 
We "adopted" a Yellow Clown Goby as well, and then I decided I didn't like the tank just out in the open, as I saw too much light spillage....

And the tank stand/canopy was born!

The workshop
2011-02-22%2019.30.51.jpg


The toolset...and beverages
2011-02-22%2019.30.41.jpg


C-brackets rough cut and assembly
2011-02-22%2020.53.39.jpg


Bse rough assembly
2011-02-22%2021.59.23.jpg
 
Uppers and lowers going together (sidenote: this was meant to come apart. The base is stuck under the tank, whilte the sides and hood all come off as one piece, in the end it worked out better than i thought it would)
2011-02-23%2019.00.42.jpg


Corners after putty
2011-02-23%2019.00.50.jpg


Test fit, no hood no base
2011-02-23%2019.20.58.jpg


Test fit with base hood and hinges
2011-02-23%2020.16.21.jpg


Hood up
2011-02-23%2020.16.46.jpg
 
Then I painted the whole stand black, none of which I took pictures of, but I test fitted the stand on the tank with the old incandescent light fixture

2011-02-25%2007.09.47.jpg


And our awesome little clown goby
Fishy%20Fish%20167.jpg


And the the LED build begins
The great retrofit package and heatsink shipped from Rapidled. These guys were great, and even made a custom package up for me, because none of their premade ones worked for what I wanted
2011-03-09%2018.03.54.jpg


Again, 9 LED's, dimmable ballast, full DIY dimmer kit with a potentiometer...and obviously again my beverage in the shot....

All marked out, drilling and tapping the heatsink
2011-03-09%2018.35.47.jpg
 
Drilled and tapped, first set of screws in to test fit some LED stars
2011-03-09%2020.24.10.jpg


First solder set, its a little odd to map out a 9 bulb setup, but we made it work
2011-03-09%2021.12.01.jpg


I kinda spaced on the pictures for a while until I fitted all the connections while at work and fired it up for the first time. No issues, and I have the ballast turned to about the 20% mark on the internal dimmer.

First fire up...(I seriously didn't mean for this much beer to be in this build, but the more I look, the more it shows up...)
2011-03-10%2017.35.10.jpg

These bulbs are running at 21.37 milliamps in this shot...nowheres near as high as they can go...

Multimeter running as I perform the initial burn in of the bulbs...
2011-03-10%2017.35.20.jpg
 
And now for the money shots...no pun intended

Lights on in the room, LED's on
DSC03776.JPG

This image looks like there is a lot of light throw out the side of the tank, but it isn't that bad standing in our room

LED's on, room lights off...
DSC03775.JPG


I tried to take a couple shots with the LED's dimmed all the way, to show how we run it at night, but all my silly P and S camera did was stretch exposure time, so they look very similar.

Individual livestock shots

I hope people have seen our Picasso's, they show up in many places on this site... but heres their mugshot
turtletrax624.jpg


Blue/Red/Orange Acan
DSC03778.JPG
 
Sun coral
DSC03779.JPG


Magician paly, pompom xenia, and of course the clown goby
DSC03781.JPG


Single green candy cane and Keds Reds Zoas
DSC03780.JPG


Green mushrooms
DSC03782.JPG


And of course, one last shot of our clown and her RBTA...
DSC03777.JPG
 
Hope you enjoyed these as much as we have building it! It's come a long was in the 3 months we've had it, but its a nice little piece to have in our bedroom, and it gives her her own little place to aquascape as she pleases. She still has a couple coral pieces on the frag rack in my tank to come over, but we figured take it slow, and move them over in shifts

Frag rack
DSC03785.JPG


Not all hers :)

And one of the reasons I built all of this for her...my Valentine's day present (funny...because I hate that day, its my last name...really)
DSC03783.JPG


Enjoy all, and comments/questions or otherwise, fire away!

Cheers
...Skeeter...
 
Nice job on that canopy and lights Jordan... She def knows what to have you build :p
 
Yea that is true of the clown gobies. I'm gonna watch him, but he's pretty well fed. Also the SPS stuff isn't gonna go in there for a little. I am still acclimating the fish/nem/softies to the high output of the LED's. They are only run at about the 50% mark on the switch. As soon as I get it to the 75-80 area, we're gonna experiment with some SPS pieces from the big tank. Thanks for all the comments all!

...Skeeter...
 
Looks great! Keep an eye out on the clown goby. I think I read somewhere they sometimes nibble on SPS.

I dont think they nibble, I think they "try" to lay eggs, and disturb the coral.I had 2, and loved them both, you will learn to hate them, I did. All your coral will keep closing from them, they are cool to watch though. I just finished my LED build, and its been a long 4 days. Mike at Rpid is a good guy, and alot of help. Nice job on the build
 
Back
Top