....Reefrieds' Downsize Saga....

Reefried

In need of Reefhab
So as promised I decided to chronicle my new tank downsize/build....

....first off let me say that i NEVER saw myself going smaller, I started with a 54 gallon corner with a canister filter and HOB skimmer, and soon upgraded to a 75rr, which was set-up for about 2 years, (and never reached the potential that i had dreamed of) and i always pictured myself going bigger than that someday maybe to a 180 or something along those lines......

so with that said i decided to break down the 75 and go smaller, the main reasons behind the breakdown were to lesson the time spent maintaining the tank, I recently started to play a lot of glof and during the summer months playing on weekends, mostly sundays (which happend to be my day to complete the tank chores) the tank would take a back seat to golf and i didnt want the inhabitants to suffer.....and reason #2 is to become more "GREEN" or energy efficient, when i first started in this hobby i just wanted the biggest most powerfull pumps/lights/skimmers and could care less about power draw/watts, and with the "belt" tightening me and my wife were working on, cutting costs, and being more finnacially aware was a must as we have two daughters, so the tank was a great place to cut back .....and reason #3 is that being into the "high end"/'designer" corals its much easier to fill a smaller tank....in 2 years my 75 still looked empty....

..
..I knew i would be selling some of my livestack and equipment from the 75 to help offset some of the costs for the new tank/stand/canopy...3.

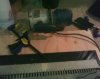
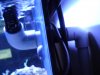
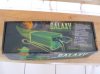
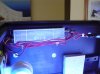
So the system outline was going to be a small mixed reef display, heavy on the LPS side with a few "choice" SPS on the top and some cool rics and zoo's too!! with a matching stand/canopy and 10-20gall sump housing an efficent return pump an oversized skimmer,and filter socks and probes.. and have some room left in the stand for a top-off resv.....the tank would be lit by 1 250W 20k with 1 24w T5... and flow is provided by a single Vortech MP40w...

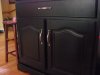
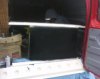
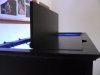
.....So the downsizing began....first was to chose a tank size..I wanted to go with a 29, or 30 or 40 breeder as they dont have a center brace and i wanted to use 1 of my 2 reef optix 3 250w metal halides and 1 of my 24W T5's to light the tank and the center brace would be right in the way of light from the MH.....so i settled on a 29gall and had jeremy from CRA order it, and also drill a hole in it for the drain.......while i was waiting for the tank to come in I went by tropic isle and they had a beautifull 37 gall tank on a Sedona (marineland) stand in black with the canopy and it looked real sharp, and i knew that the stand/canopy would work for the 29 as they are the same dims. except the 37 is taller.....but looking at the 37 i realized that i had a few more options for aquascaping, and with the added height the LPS on the bottom wouldnt get roasted by the 250w Mh as its pretty powerfull for a 29.....so they (tropic isle) offered me a deal i couldnt refuse on the stand/canopy and they had a 37 in stock and could put the hole in it as i loaded the stand into my car so i went with it, i knew i could saell the 29 easily enough down the road....so as of that night i was going ith a 37 gall display and had all the equipment i needed to run it except for the sump.....
 
Last edited:
......So i went to petco the next day and got a 10 gall for my sump, and with the 75 i used a 20 high for a sump with three baffles for bubble trap and it worked great...and i decided that in the new sump i didnt need to baffle it as it will not have much water flow through the sump and i will have a filter sock on both the return and the skimmer out-put followed by the black foam on the mag drive pump intake i shouldnt have too many micro bubbles in the display....

...so all the equipment was ready and i had the tank stand canopy and sump so all i had to do was get down to business:cool:....

....Spec/Equipment List:..

...TANK- 37 gallon marineland with hole drilled in back right top for 1" bulkhead.. with a 10 gallon sump..

...STAND/CANOPY- Sedona style black stand/canopy by marineland {I think}..

...LIGHTING- 1X250w Reef Optix 3 DE Pendant driven by a Galaxy 250w electronic ballast, and 1X24w T5 retro driven by a workhorse ballast, and 8X1watt blue moonlights by Current (the linkable ones they rock!!)..

...FLOW- 1 Vortech MP40w with Battery backup..

...SKIMMER- I'm using the skimmer from my 75 that was rated for 250 galls befor the 2 mods i did to it....its a stock Pro-Clear (out of florida) which i got for a great price new $50 and it came with a rio 2100 that i replaced with a sedra 3500 $75, and i did a ball valve mod to it also and it has been great i can fine tune it pretty precisely and i get some nasty skimmate from it.....i plan on replacing it with an octo extreme 160 and hopefully will have it by fathers Day;)..

...RETURN- Mag 5.....say what you want about them but they have been great for me and the sedra is much louder than the mag so noise wasn't an issue..

...OTHER STUFF- i plan on using two-part to controll alk/calcium/mag and I also hope to not need any carbon or Po4 reactors I ran both in the 75 and with this tank being less SPS dominate I think i can achieve a medium nutrient based system with a detectable but not SPS growth inhibiting PO4 level, with HEAVY skimming, amino dosing and maybe a carbon based exporting method (V.S.V./ prodibio) if phosphate/nitrate becomes a problem down the road.......I also plan on going controllerless as the vortech controlls itself and my lights are on good intermatic timers, and I have a temp and PH moniter....so other than that I might add a Kalk reactor down theline if needed....but i want to K.I.S.S....


........so as a little tid-bitt i thought I'd compare power draw for the two tanks....

Instead of listing both tanks specs i'll just list the difference in the two.......I cut down 250w on metal halide lighting and 24w of T5...so thats 274w....I went from a mag 9.5 {93watts} to a mag 5 {45watts} so thats 48 more saved for 322 total.....for flow i had 1 vortech and 2 mj1200's in the 75 and just the vortech in the 37 so thats 40watts {20watts each for the mj 1200's} more that i cut out for a total of 362....I'd add in the mj 600 that use to run my 2 media reactors that a measly 7.54 watts but I added the 8watts of moonlights so they cancel each other out.........also everyting is run for the same amount of time in both tanks except the Mh which will go from 10/hours per day to 8 so thats even more savings...
 
Last edited:
The Set-up

So the buliding began the stand went up easy, the canopy did too but when I finished i had a feeling that the Mh would be a tight fit height wise, meaning that the pendant would be really close to the water, about two inches to the top of the tank and about 3.5 to the water surface.....so something had to be done.....pic of the stand
 

Attachments

  • P1020515.JPG
    P1020515.JPG
    93.1 KB · Views: 440
You could probably cut the top out of the canopy and have like a LB reflector and it wouldnt look bad at all...
 
i had to get the 75 broken down as some of my corals were suffering from a little "old tank syndrome" basically me neglecting the tank during its last month..........

....so i had the stand up and I wanted a black backround as i think it makes the tank look a little deeper, so 3-4 coats of krylon fussion flat black and i had the tank on top of the stand i just needed to plumb it....

....I decided to go with a coast to coast overflow and wanted it to be black so i ordered the pieces i needed from Altec Plastics in South Boston Great service by the way I odered the two side pieces and the long front piece along with a cover as i didnt want algea growing in my overflow box......so researching overflow boxes I found that acrylic ones needed to be thick {like1/4"} or they can bend or "bow" in time so to avoid that I had 1/8 glass cut at a local glass shop the size i wanted and planned to attach the acrylic "covers" to the glass so i can have both a strong and a black overflow....now to attach them I used silicone and put a layer between the glass and acrylic and it was working out great and after 3 days drying the overflow box was done.....
 

Attachments

  • paintedblack.jpg
    paintedblack.jpg
    6.7 KB · Views: 399
  • routerteeth1.jpg
    routerteeth1.jpg
    7.8 KB · Views: 402
Last edited:
You could probably cut the top out of the canopy and have like a LB reflector and it wouldnt look bad at all...

.....stay tuned for what I ended up doing as this thread is retro-active to when I started the tank build.....
 
Dun Dun Dun

So the next day I had about 60 gallons of fresh salt water mixed for 3 or so days and i adjusted all the water to the levels i keep my system at, and i was prepping the tank for the overflow box install and i dropped the overflow box!, and cracked the glass "frame"....i just looked for pics of it but i guess in my anger i forgot to whip out the camera {Oh and the pics i post that come up small are from my sidekick so no bashing:D}.......

.....so at that point my wife was ready to kill me with 2 40 gall brutes in the living room 5 gall buckets of coral everywhere......so something had to be done...

.......Oh and i forgot to add that i wanted to go with all NEW Liverock for the new tank meaning that i didnt want to transfer any rock from the 75 as most of it was getting covered with unwanted macro/micro algea, and most of all i had the dreaded wafer algea:eek:.....so i purchased about 35 pounds of liverock from my LFS that was in a tank with no corals and a few fish for awhile so unwanted pests especially AEFW's and Red Bugs were unlikely......

....so to just get the living room cleared up for my awesome wife and to get the tank going i decided to attach an elbow directly to the bulkhead and put a drain strainer on it...i couldnt see any drawbacks to this instaed of the O.Box besides noise,and obviously surface skimmimg, and figured that if i decided to build another one i can lower the water level and install it in 2 days down the line.........

....so i went with the elbow/strainer and never looked back, i plumbed in the sump and got the tank running.....pics of the elbow/strainer, and plumbing:
 

Attachments

  • P1020519.JPG
    P1020519.JPG
    93.8 KB · Views: 402
  • P1020520.JPG
    P1020520.JPG
    48.7 KB · Views: 394
Last edited:
Breakdown

In between me breaking the overflow box and finishing the plumbing/ getting the tank wet, came the 75 breakdown, and i almost brokedown:(......heres some of the losses....
 

Attachments

  • P1020534.jpg
    P1020534.jpg
    87.8 KB · Views: 394
  • P1020529.jpg
    P1020529.jpg
    87.6 KB · Views: 406
  • P1020530.jpg
    P1020530.jpg
    87.6 KB · Views: 390
  • P1020531.jpg
    P1020531.jpg
    85.2 KB · Views: 401
wow those losses suck! but not you have a nice center peace for some table.... or put one in a glass box.

.....I know the losses hurt, but I learned from it....and i couldnt use it as decoration as every time i'd look at it i get sick and throw it out..
 
Looking good so far... Sucks about the loss... And you won't regret the octo extreme 160. I have one on my 55 and it's a great skimmer with low watts :D
 
canopy

...back to the canopy..So during the test fit with my pendant I realized where i wanted to put it would have the glass really close to the water surface, so i had to do something... with the stock canopy I didnt have many options, as far as mounting the pendant diff ways......However i wanted the sleek look of this stand/canopy set-up, and also didnt have the time to build one or have one built, so I'd have to figure something out, and FAST.....

....I came up with an idea to make the canopy a little taller, all I needed was about 1.5"....2" would be great, so the end result would be the bottom of the pendant being 4" from the top of the tank, and about 5.25" from the water........I was just going to make a 2" box the exact dims of the bottom of the canopy probablly out of Maple ply or something and use brackets or wood blocks on the inside to join the two, and then paint it to match (gloss black).........

......the canopy design is one that has no doors on the front or sides, but it has two "pannels" or hatches that come off the top on each side of the center and allow access to the top of the tank....being that its made for a 29 or 37 gallon tank you can reach the bottom from the ground for the 29 and a stool for the 37.....pics below...
 

Attachments

  • P1020549.jpg
    P1020549.jpg
    91.3 KB · Views: 354
  • P1020550.jpg
    P1020550.jpg
    87.4 KB · Views: 356
  • P1020552.jpg
    P1020552.jpg
    99.8 KB · Views: 348
Looking good so far... Sucks about the loss... And you won't regret the octo extreme 160. I have one on my 55 and it's a great skimmer with low watts :D

....Thanks and i was planning on asking you how you like it, but from what i've read they seem to be great....
 
.....while i was thinking of what to build the canopy extension or riser out of I remembered the set-up comes with a "frame skirt" to go around the bottom of the tank so it looks like the tank is recessed into the stand, and so you dont see the bottom rim of the tank.......and its the same dims as the canopy and the same material and color so i brought it into work and brad nailed 4 blocks of pine to the inside of the canopy and to the "frame skirt" and it provided the 2" i needed, the only thing is that there is a small gap between the two pieces that i can live with, and it was easy enough to accomplish this task and it let me move on with the light set-up and tank filling.......you can see the extended canopy when i post pics later......but heres some pics of some goodies,and of the canopy set-up which incorporates a 250W reef optix 3 with a 20K ushio and a 24w SLS retro T5 with a giessman actinic plus bulb and 2 soon to be 4 2w moons from current.....
 

Attachments

  • P1020558.jpg
    P1020558.jpg
    32.5 KB · Views: 342
  • P1020559.jpg
    P1020559.jpg
    29.3 KB · Views: 331
Last edited:
...to mount the pendant i just used the eye hooks that came with it and used a 1 foot threaded rod that went over the cross brace of the canopy and through the two eye hooks, i made it so the top of the pendant doesnt touch the wood of the canopy so it wont get too hot..and just cut out the shape of the threaded rod in the two "access hatches"...the beauty of these removeable hinged pannels/hatches is that they can come off and provide plenty of heat exchange, having both the back and top of the canopy open will keep the tank cool I think...


...and i know your wondering what i plan on doing with the center brace blocking light since i went with the bigger tank...and i actually just cut :: 2 holes in the brace it self that are 1" round and they let a lot of light in and prevent a 'black shadow' in the middle of the tank...the brace is still as strong as it was, and i tested the tension of it with the tank full before and after the holes and theres no difference, granted I wouldnt do this to a tank that was any larger and i know how dangerous it is, but i actually think this tank would be fine with no center brace at all......I also positioned the light 65% over the left side of the brace and plan to keep lower light SPS on the right top and lower light LPS/softies on the right bottom.....

.....I also mounted the T5 ballast in the canopy and plan to build or buy a little stand similar to mine on a smaller scale for the galaxy ballast as right now it sits beside the tank on a small shelf...
 

Attachments

  • P1020557.jpg
    P1020557.jpg
    88.9 KB · Views: 335
  • P1020556.jpg
    P1020556.jpg
    92.9 KB · Views: 341
  • P1020554.jpg
    P1020554.jpg
    92.5 KB · Views: 335
  • P1020555.jpg
    P1020555.jpg
    92.4 KB · Views: 334
...it looks like the T5 is getting a little blocked by the mh pendant, but its just the angle i get PLENTY of T5 light in this tank and i cant really complain as i didnt have much room for stuff and managed to fit everything without having a mess of wires and fire harzards.......

....to mount the moons i just used a 90 angle bracket and epoxied the light to the angle bracket and then used a self tepping metal screw to attach the bracket to the light....
 

Attachments

  • moons1.jpg
    moons1.jpg
    6.3 KB · Views: 323
  • moons2.jpg
    moons2.jpg
    6 KB · Views: 341
  • moons3.jpg
    moons3.jpg
    8.9 KB · Views: 336
Back
Top