Howdy all, I don't see a lot of names I recognize here anymore (been quasi-reefing but off the BRS site for some time) but figured I'd post this up since the bug seems to be nibbling at me again.
Quick intro, Rob Tess, member since gods know when (2002?), former Secretary and muckraker") Had a 75g at home for a long time, got fed up, tore it down to a 29g to hold my most prized inhabitants until I got the bug again. Then about 4 years ago my boss let me set one up in the foyer of the office. It's a 75g as well. Went well for a few years then slowly started degrading mostly because I started traveling a lot. The big kicker was my most recent project took me to Djibouti for 11 months and while a tank can be kept stable by almost anyone, for it to thrive you need someone with passion for the hobby (most anyone reading this understands I'm sure).
Had a 75g at home for a long time, got fed up, tore it down to a 29g to hold my most prized inhabitants until I got the bug again. Then about 4 years ago my boss let me set one up in the foyer of the office. It's a 75g as well. Went well for a few years then slowly started degrading mostly because I started traveling a lot. The big kicker was my most recent project took me to Djibouti for 11 months and while a tank can be kept stable by almost anyone, for it to thrive you need someone with passion for the hobby (most anyone reading this understands I'm sure).
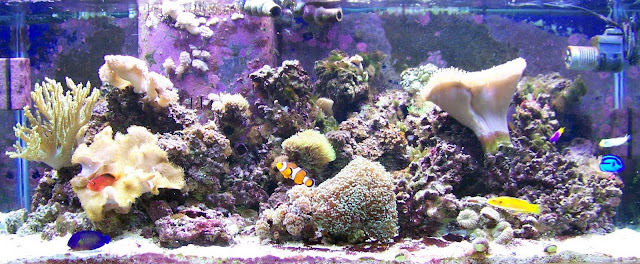
So without detailed attention the tank went from this:
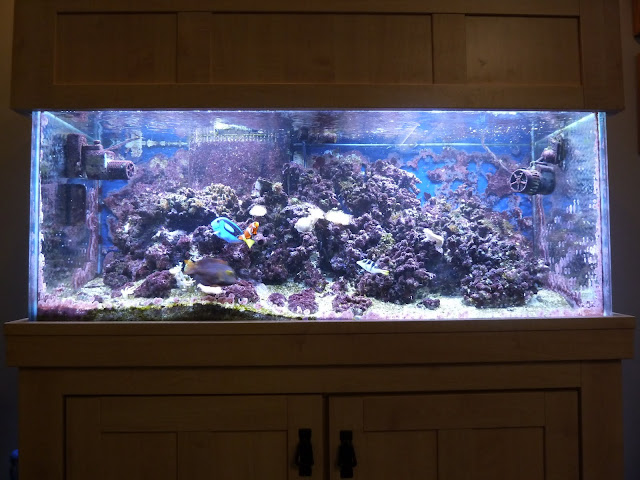
to this:
One of the big things that went wrong while I was away was that one of the ballasts in my light fixture died. I started the tank with an Aquactinics 5xT5 fixture that I got at a BRS auction way back when. It was a great fixture. My first inclination when the ballast blew was to just get a new ballast and keep going. But I was never able to really get the color I looked out of the T5s and I missed the shimmer of metal halides. So after a little research I decided to jump into LEDs.
The pre-made fixtures just didn't seem to be what I wanted. Either the mix of bulbs wouldn't get me the color I wanted or the fixtures were uber expensive. I had been a big fan of DIY when I was really really into the hobby and so poking around the various LED sellers I found this Rapid LED Retrofit Kit. I bought 2 kits along with 2 5.9" x 16" heat sinks and some extra adhesive.
The build was pretty simple. I followed the instructions for the most part. The only thing I varied on was that I didn't buy pre-drilled/tapped heat sinks and I elected not to drill/tap them myself. Many threads at Reef Central led me to the conclusion that the thermal adhesive would be adequate so rather than a lot of drilling, I just glued the LEDs to the heat sinks. 48 LEDs per heatsink, 50/50 mix of Royal Blue and Cool White.

I had never soldered anything before but it wasn't hard to learn, my only recommendation there is don't waste money on a battery powered soldering iron. I was having a hard time with the one I first bought and someone told me after the fact that I should try a real plug in soldering iron. That worked brilliantly.
The LEDs are wired in strings by color using the recommendations from the instructions. 12 LEDs per driver.
The next step was a bit more tricky because I wanted to fit the lights into the shell of the old T5 fixture. So I gutted the old T5 ballasts and sockets. I drilled one hole at each corner of each heatsink. Drilled holes in the top of the fixture and hung the heatsink/driver/LED rig from the shell. The only downside to this is that the two rigs sway a little when I move the light and I have to be careful when I turn it over to work on it. But it all fit (sort of see Lessons Learned below) and everything fired up just fine.


The second full tank pic is what it looks like on the tank. Its a great amount of light, a bit more than with the T5s but not too crazy. And the shimmer is there which I love.
So Lessons Learned:
1) Follow the instructions. I mis-wired one driver first thinking I knew what I was doing. It went up in a puff of smoke.
2) Test and retest the LEDs before gluing them. Everything from RapidLED came in working. I tested everything twice. But even still one LED was dead after I wired them up (you can see it in the pic). Pulling it off the heat sink and re-soldering was a PITA. If I had drilled and tapped this would have been easier but . . .
3) I wired two drivers each to the power cords so there are four cords in all tied to eight drivers. I wired by color and per heat sink (e.g., all the blue lights on one heat sink are wired to the same plug). In retrospect I should have wired half the blues on one heat sink and half the blues on the other side to the same cord so I can get an even distribution of light across the tank row by row if I put each plug on a separate timer.
4) The kit came with lenses. I admittedly hadn't thought through fitting everything in the old fixture shell or what the part of the fixture that faced the water would look like. The lenses stick down about 1/4" or so and the way I have it rigged I couldn't use them, they wouldn't fit. Also the wiring would be exposed to splashes without an acrylic or glass piece to protect it and the lenses would have to poke through that protective sheet. This is complicated because the lenses have to be glued to the LED boards. I am rethinking this now so I can rework the fixture and get them on there.
Thats about it I suppose. I'm trying to resurrect this tank so hopefully I'll get to meet some of you in the future. AS you can see the tank is essentially a FOWLR so it needs frags. :-D
Quick intro, Rob Tess, member since gods know when (2002?), former Secretary and muckraker
Had a 75g at home for a long time, got fed up, tore it down to a 29g to hold my most prized inhabitants until I got the bug again. Then about 4 years ago my boss let me set one up in the foyer of the office. It's a 75g as well. Went well for a few years then slowly started degrading mostly because I started traveling a lot. The big kicker was my most recent project took me to Djibouti for 11 months and while a tank can be kept stable by almost anyone, for it to thrive you need someone with passion for the hobby (most anyone reading this understands I'm sure).So without detailed attention the tank went from this:
to this:
One of the big things that went wrong while I was away was that one of the ballasts in my light fixture died. I started the tank with an Aquactinics 5xT5 fixture that I got at a BRS auction way back when. It was a great fixture. My first inclination when the ballast blew was to just get a new ballast and keep going. But I was never able to really get the color I looked out of the T5s and I missed the shimmer of metal halides. So after a little research I decided to jump into LEDs.
The pre-made fixtures just didn't seem to be what I wanted. Either the mix of bulbs wouldn't get me the color I wanted or the fixtures were uber expensive. I had been a big fan of DIY when I was really really into the hobby and so poking around the various LED sellers I found this Rapid LED Retrofit Kit. I bought 2 kits along with 2 5.9" x 16" heat sinks and some extra adhesive.
The build was pretty simple. I followed the instructions for the most part. The only thing I varied on was that I didn't buy pre-drilled/tapped heat sinks and I elected not to drill/tap them myself. Many threads at Reef Central led me to the conclusion that the thermal adhesive would be adequate so rather than a lot of drilling, I just glued the LEDs to the heat sinks. 48 LEDs per heatsink, 50/50 mix of Royal Blue and Cool White.
I had never soldered anything before but it wasn't hard to learn, my only recommendation there is don't waste money on a battery powered soldering iron. I was having a hard time with the one I first bought and someone told me after the fact that I should try a real plug in soldering iron. That worked brilliantly.
The LEDs are wired in strings by color using the recommendations from the instructions. 12 LEDs per driver.
The next step was a bit more tricky because I wanted to fit the lights into the shell of the old T5 fixture. So I gutted the old T5 ballasts and sockets. I drilled one hole at each corner of each heatsink. Drilled holes in the top of the fixture and hung the heatsink/driver/LED rig from the shell. The only downside to this is that the two rigs sway a little when I move the light and I have to be careful when I turn it over to work on it. But it all fit (sort of see Lessons Learned below) and everything fired up just fine.
The second full tank pic is what it looks like on the tank. Its a great amount of light, a bit more than with the T5s but not too crazy. And the shimmer is there which I love.
So Lessons Learned:
1) Follow the instructions. I mis-wired one driver first thinking I knew what I was doing. It went up in a puff of smoke.
2) Test and retest the LEDs before gluing them. Everything from RapidLED came in working. I tested everything twice. But even still one LED was dead after I wired them up (you can see it in the pic). Pulling it off the heat sink and re-soldering was a PITA. If I had drilled and tapped this would have been easier but . . .
3) I wired two drivers each to the power cords so there are four cords in all tied to eight drivers. I wired by color and per heat sink (e.g., all the blue lights on one heat sink are wired to the same plug). In retrospect I should have wired half the blues on one heat sink and half the blues on the other side to the same cord so I can get an even distribution of light across the tank row by row if I put each plug on a separate timer.
4) The kit came with lenses. I admittedly hadn't thought through fitting everything in the old fixture shell or what the part of the fixture that faced the water would look like. The lenses stick down about 1/4" or so and the way I have it rigged I couldn't use them, they wouldn't fit. Also the wiring would be exposed to splashes without an acrylic or glass piece to protect it and the lenses would have to poke through that protective sheet. This is complicated because the lenses have to be glued to the LED boards. I am rethinking this now so I can rework the fixture and get them on there.
Thats about it I suppose. I'm trying to resurrect this tank so hopefully I'll get to meet some of you in the future. AS you can see the tank is essentially a FOWLR so it needs frags. :-D
