You are using an out of date browser. It may not display this or other websites correctly.
You should upgrade or use an alternative browser.
You should upgrade or use an alternative browser.
Jenn's 72 Bow Rebuild from Start to enjoyment (hopefully)
- Thread starter Jennifer
- Start date
OP
OP
where did you find the red fans? nice touch. what do you use to cut your acrylic for the housing>?
I got them off of ebay. I payed $20 for 10 fans shipped to my door.
here is some listings computer fans
This is the ebay seller I got them from
I saw this tank yesterday and it is going to be amazing once Jen is finished with everything. The rock work looked great as well.
Thanks Mark !
The tank will be done filling with RO and salt tonight, so I hope to have some pics up of the rockwork then.
Very nice Jen, Great Job, i really enjoy reading your threads!!
Thanks Shawn !
Glad you find it interesting, that was my goal after all !
Last edited:
OP
OP
are those computer fans that you retroed with a ac plug? or did you buy them with the plug? been looking for a fan and havent been able to find a decent fan that you can plug into an outlet.
Yup standard 12 v computer fans. I used the included molex connectors to attach a 12v wall wart to power the fans. Just make sure that the wall wart puts out enough amps/milliamps to run the fans.
I am going to have 6 fans connected to my cooling circuit so I may use a 12 v cb radio power supply that puts out 3 amps to run all of the fans. I have had that power supply kicking around for 20 years (no lie and it still works great)
Radio Shack carries AC powered 80mm and 120mm fans for about $20 and they are pretty quit ( not silent but quit)
OP
OP
I spoke to Leroy at Garf.org , what a nice guy to talk with Very knowledgeable.
As soon as my tank is filled with slat to 1.024 and up to temp he will send me out the Garf grunge. It should take 2 days to arrive , I am very excited to cycle my tank with this stuff. I have high hopes with the large variety of coraline algae and micro organizems (sp ).
Garf grunge plus
Garf (dot) org
There is even a very good possibuility of snails brittle stars , bristle worms and lots of other good things.
OP
OP
Woohoo we have saltwater!
It is up and running, the saltwater is in and up to temp.
78 degrees
1.024
8.10 Ph
Orp 145 - Way low but the probe was only hooked up yesterday < I think there is a break in period with orp probes.
Thanks to being winter my 36 GPD RO took 72 hours to fill the whole system.
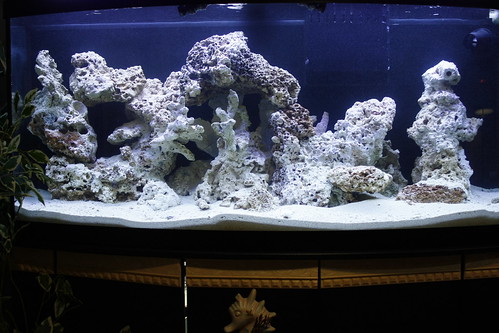
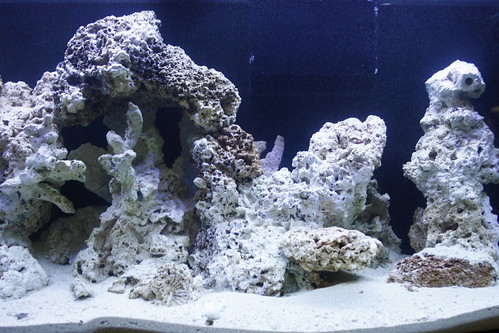
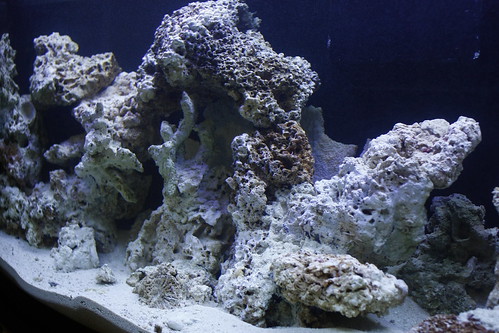
Also the rock work is all done. I forgot to charge the batteries for my camera so no pics of the rock build , so I will have to describe it.
Not a complicated process at all. I simply used a plywood mock up of the tank built to exact dimensions of the inside of the tank (available if anyone wants the mock up)
Next:
Dry fit the rocks as best you can to form the structures you are looking for (caves, Bridges ,etc). You can use a hammer or chisel to get the rocks to fit better. Once you have a rough idea you can start gluing. I used black pond foam from the home depot. Separate the 2 rocks you are gluing just a bit so you can squirt the foam in between them. Remember the foam expands so do not over do it. Settle the rock back down and squirt around the edges.
Here is where you get artistic:
Once the foam is dry (1 day) you can use a dremel with the small sanding drum and start carving out the foam to your desire. The more imperfect you are the better the end result will be. The dremel will throw a lot of dust , so use a vacuum to suck up the dust while you are carving.
Next:
Use a small brush to spread gorilla glue over the foam. While the glue is wet throw sand at it, literally like a baseball pitcher. The gorilla glue will expand as well so use the back end of the brush to jab at it and pop any air bubbles that form and make indents in the glue and foam . This will add to the realism of the finished product.
Let dry and you are all set. ( Enjoy )
It is up and running, the saltwater is in and up to temp.
78 degrees
1.024
8.10 Ph
Orp 145 - Way low but the probe was only hooked up yesterday < I think there is a break in period with orp probes.
Thanks to being winter my 36 GPD RO took 72 hours to fill the whole system.
Also the rock work is all done. I forgot to charge the batteries for my camera so no pics of the rock build , so I will have to describe it.
Not a complicated process at all. I simply used a plywood mock up of the tank built to exact dimensions of the inside of the tank (available if anyone wants the mock up)
Next:
Dry fit the rocks as best you can to form the structures you are looking for (caves, Bridges ,etc). You can use a hammer or chisel to get the rocks to fit better. Once you have a rough idea you can start gluing. I used black pond foam from the home depot. Separate the 2 rocks you are gluing just a bit so you can squirt the foam in between them. Remember the foam expands so do not over do it. Settle the rock back down and squirt around the edges.
Here is where you get artistic:
Once the foam is dry (1 day) you can use a dremel with the small sanding drum and start carving out the foam to your desire. The more imperfect you are the better the end result will be. The dremel will throw a lot of dust , so use a vacuum to suck up the dust while you are carving.
Next:
Use a small brush to spread gorilla glue over the foam. While the glue is wet throw sand at it, literally like a baseball pitcher. The gorilla glue will expand as well so use the back end of the brush to jab at it and pop any air bubbles that form and make indents in the glue and foam . This will add to the realism of the finished product.
Let dry and you are all set. ( Enjoy )

OP
OP
more...
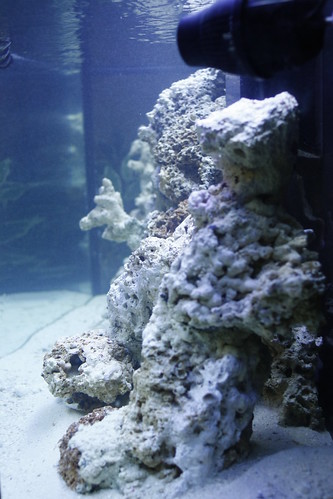
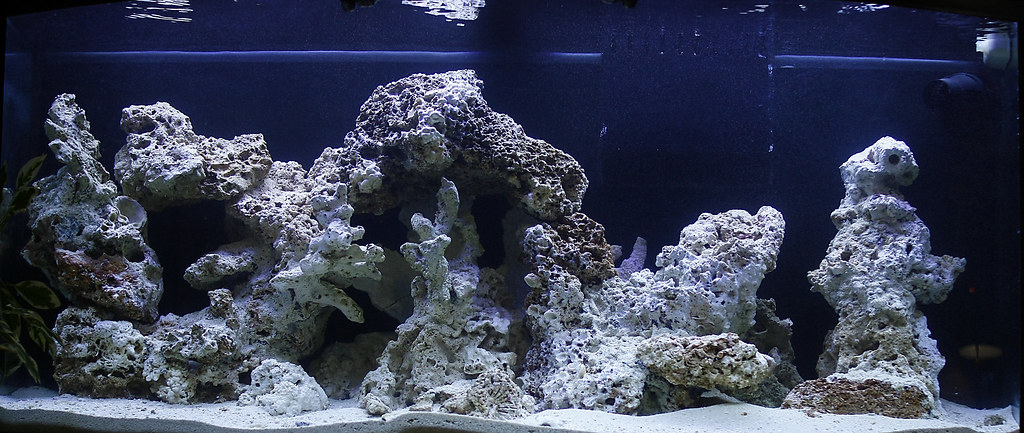
And the last is with my New to me lens. I love the barter system, I am teaching proper digital workflow and photoshop to a nice lady from Marblehead.
So as part of our arrangment i am getting a few canon lenses.
The first is a sweet 28mm 2.8 usm AF. Super sharp images from this, keep in mind I shot these images in low quality (small ) Jpeg. Imagine it shot in Raw.
anywho here you go.
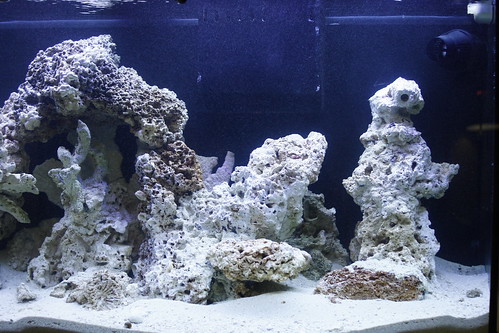
You certainly know how to kick a**, Jennifer. 
Looks great but I would keep the rock away from the side glass for cleaning.
Jim
Jim
Looks nice... you have that artistic eye.
breakin necks and cashin checks. that looks awesome.
Hey Jenn,
I noticed you had your fuge draining right into a filter sock. Do you expect that to affect pod expansion longterm? I assume you'll be cleaning those filter socks emptying all the wonderful pods that are going to build up in there?
I noticed you had your fuge draining right into a filter sock. Do you expect that to affect pod expansion longterm? I assume you'll be cleaning those filter socks emptying all the wonderful pods that are going to build up in there?
Similar threads
- Replies
- 1
- Views
- 385
- Replies
- 0
- Views
- 305
