120g Mixed Reef Build

Frag Freaks

Well-Known Member
BRS Sponsor
BRS Member
Well I figured I would get this thread going to start tracking progress of my tank build since I have started to accumulate some equipment.

I will be posting pictures as I go. I am hoping to get this up and running sometime in the upcoming months.

I have bounced around with different size tanks over the past years but never had anything bigger than a 65g. I finally have my own home and its time to get the tank I have always wanted.

The new setup is going to be a 120g mixed reef with mostly LPS and softies. I will do some SPS but I am going to keep them to a minimum.

Lighting:
8x54w T5 Lighting overdriven with IceCap 600 ballasts plus individual reflectors.

The bulb combination will be as follows:
Fiji Purple
Aquablue Plus
Geismann Plus
Aquablue Plus
Fiji Purple
Aquablue Plus
Geismann Plus
Aquablue Plus

Filtration and Flow

Some of this could change but this is what I am currently planning on.

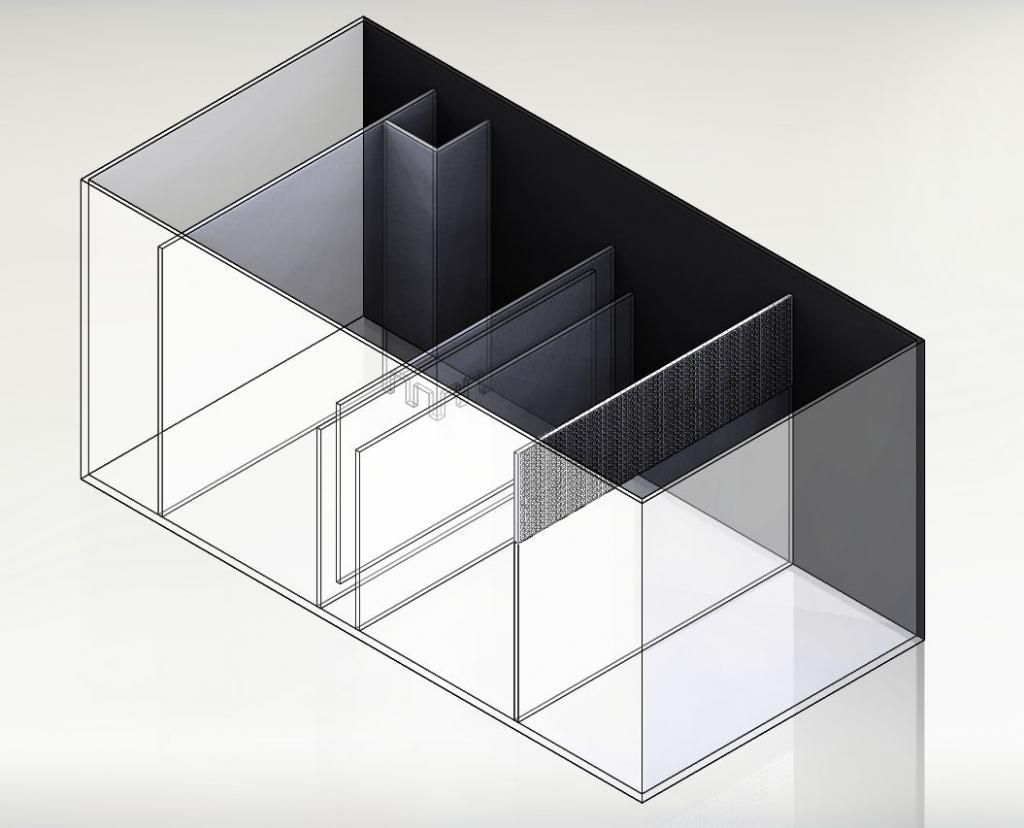
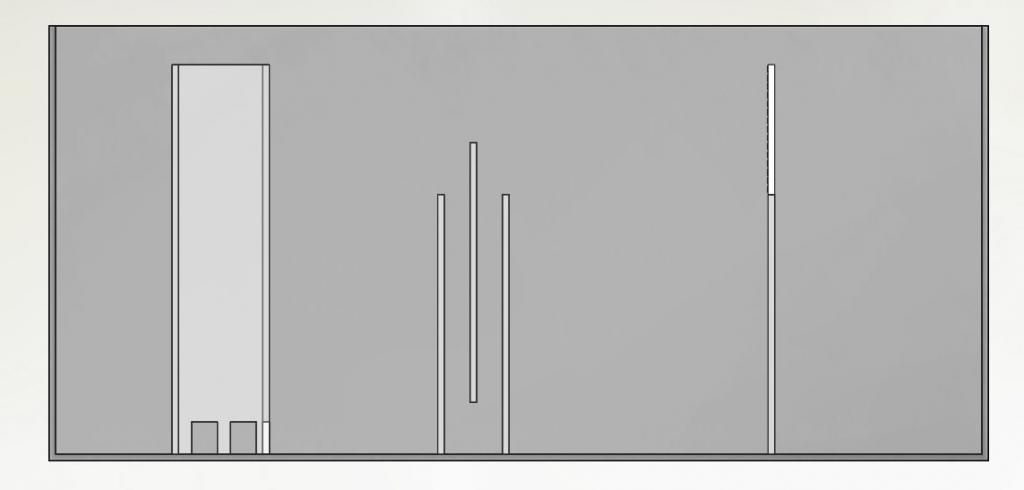
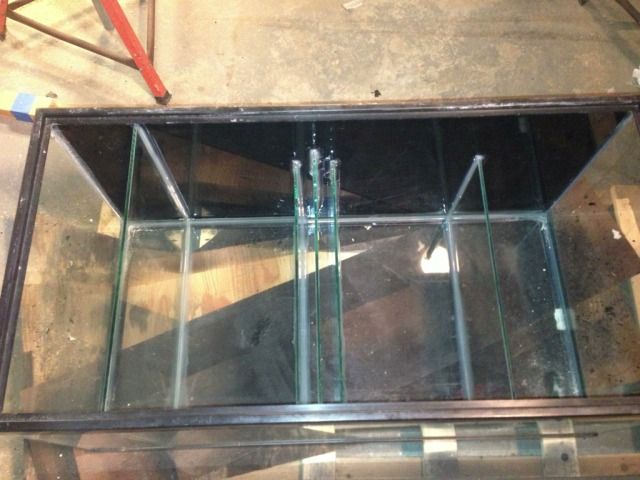
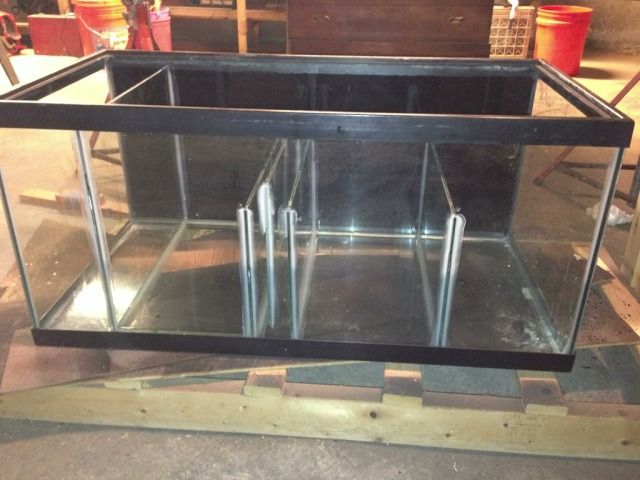
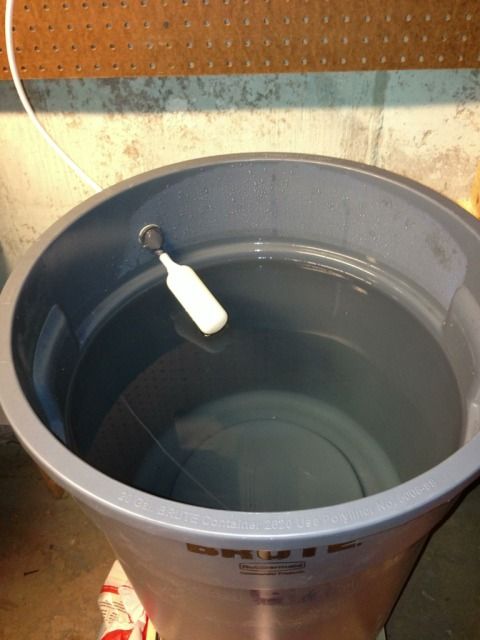
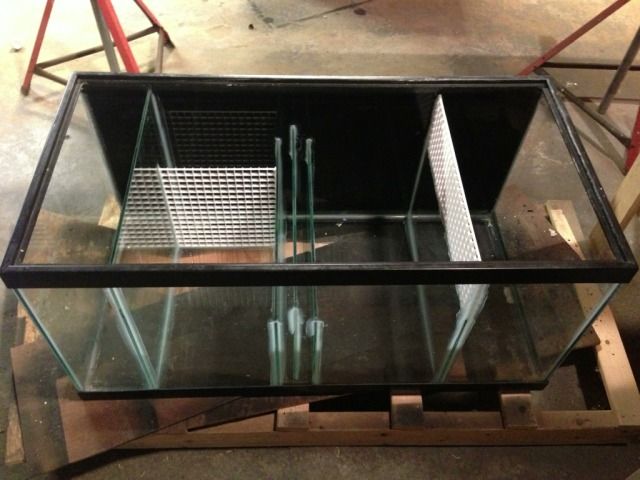
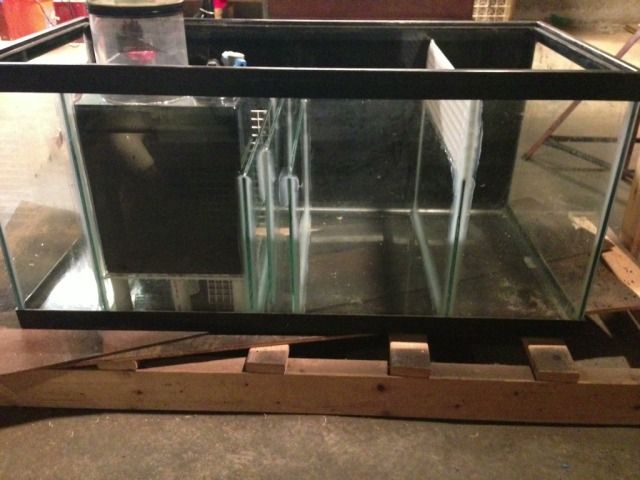
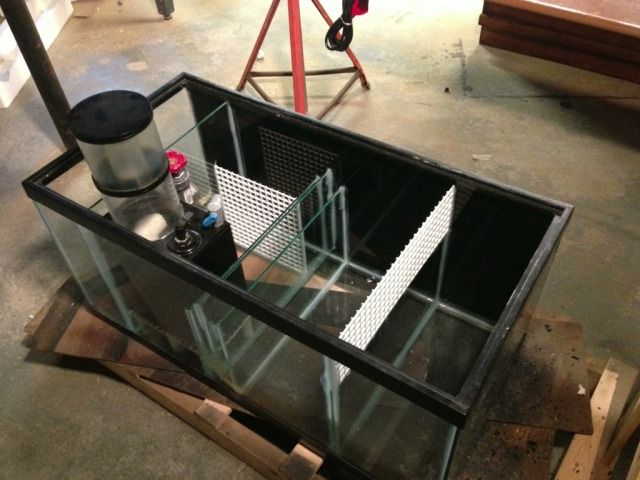
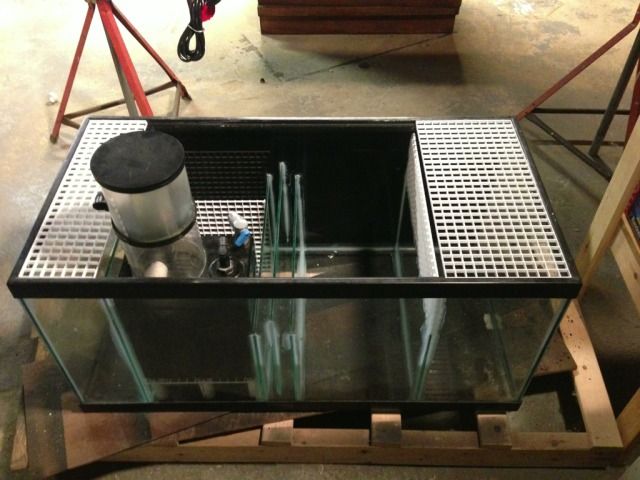
- 40G Breeder Sump/Refugium with custom baffle setup and RO storage built in.
- AquaC EV-180 Skimmer with mag 9.5 pump
- Eheim 1262 Return
- Koralia Evolution Circulation Pumps (Haven't decided on size or quantity yet)

Controllers

I am planning on doing a custom Arduino controller with the following features:

-Sump Temp, DT Temp, Canopy Temp Monitoring
-PH Monitoring
-Wavemaker Option
-Feed Mode
-Auto Top-Off
-Lighting Control
-Fan Control

I will get into more detail on this when the time comes for the build.

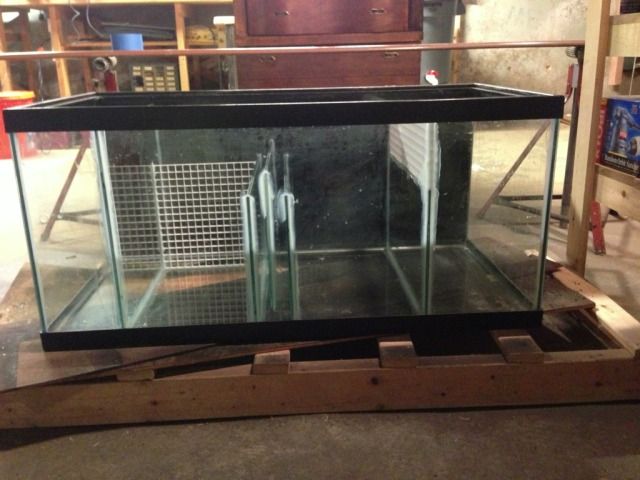
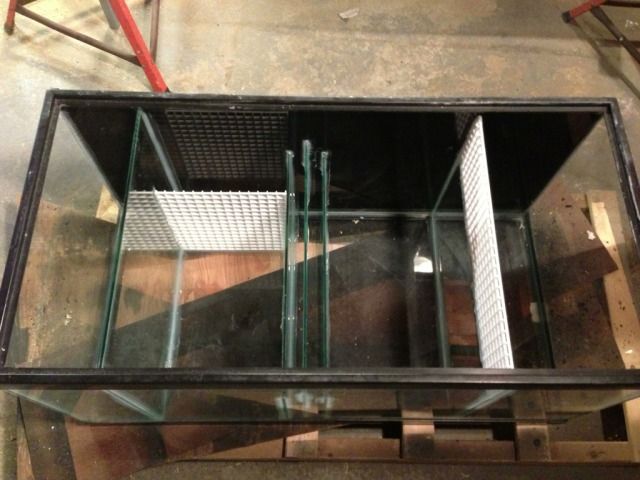
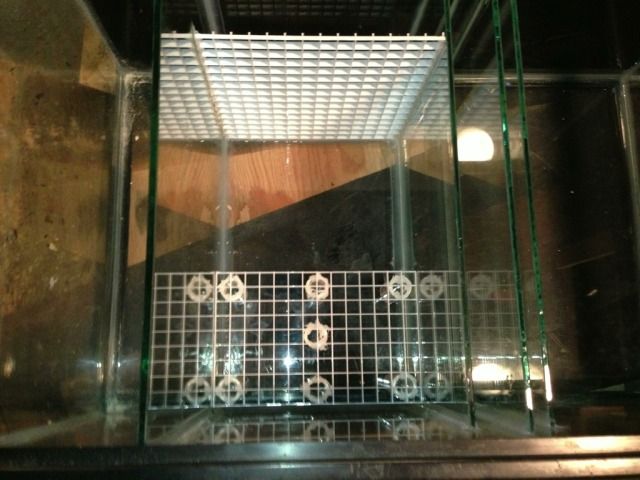
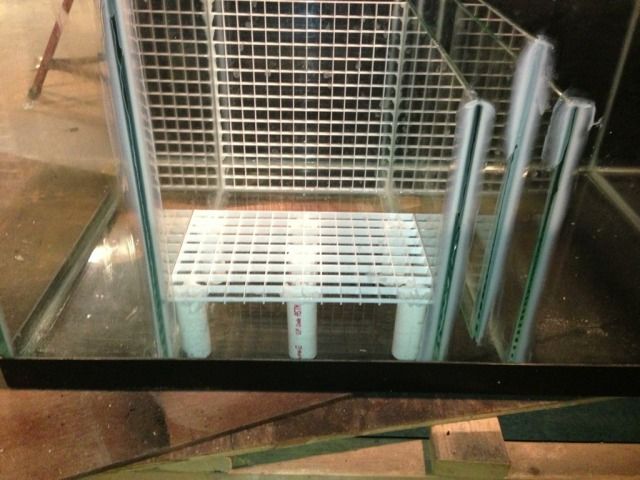
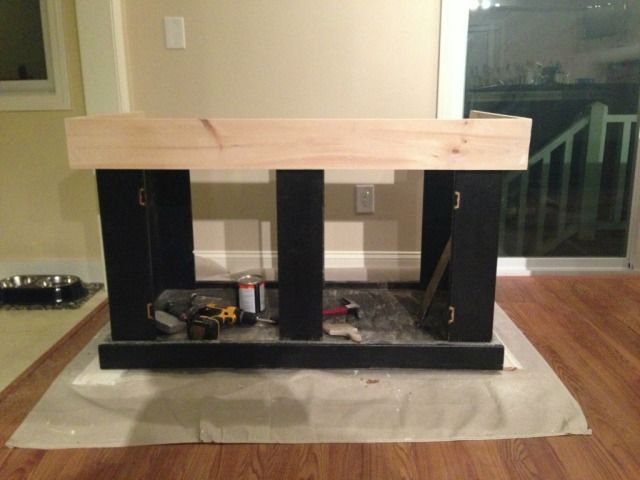
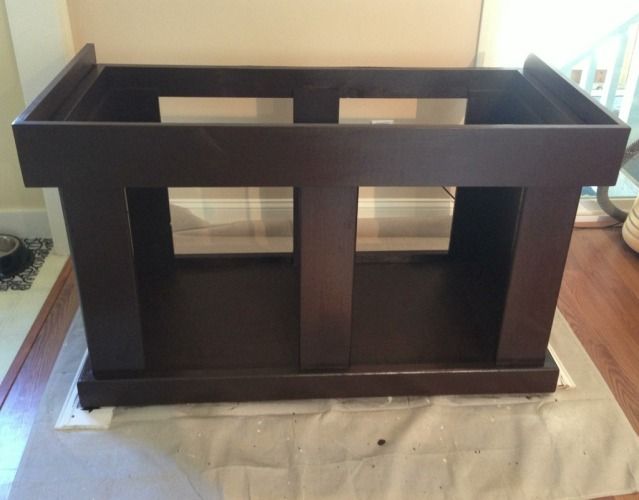
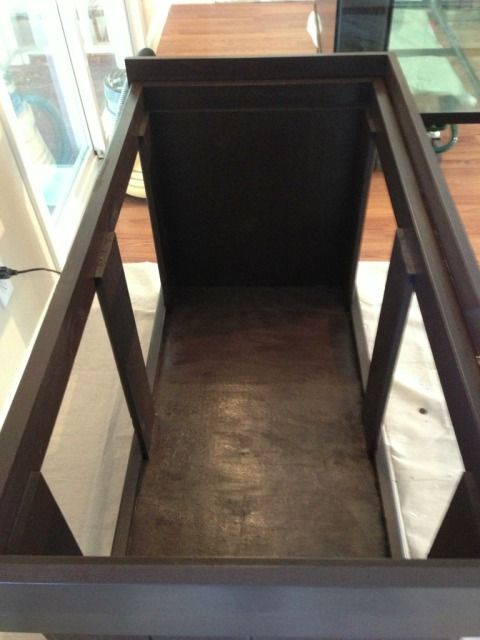
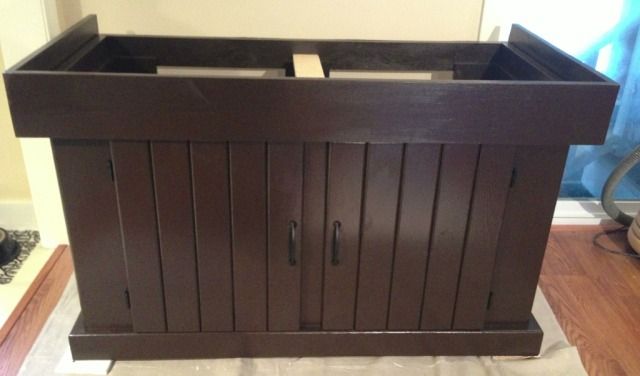
So far I do have the tank and stand. The tank is a standard 4x2x2 with dual corner overflows. Stand is a stock AGA stand.
I plan on dressing up the stand a little with some extra trim and some new paint.
A new canopy will be built to house my lighting needs.

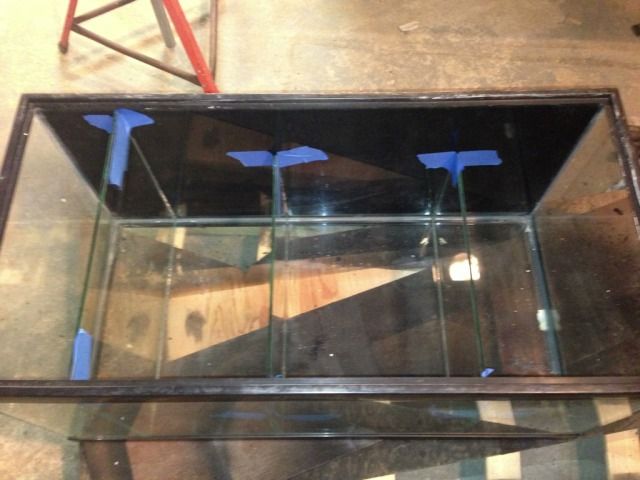
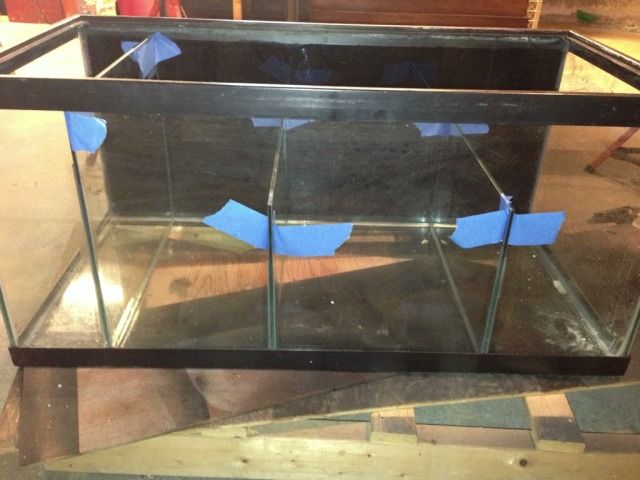
I have started on the sump and will post pictures soon.

Wish me luck!
 
I should have gotten a 120G when I got my tank. The extra width is great for adding more stuff on the sand bed. lol

Sounds like you're off to a good start. I'm using the same light fixture on my 90 right now. Can't wait to see pictures.
 
I like the 4x2x2 dimensions. It's very deceiving looking at it from the front. People (and me!) go to the sides and are like "wow, there's lots more".

My tank hasn't grown in yet but part of me wants to rearrange everything.
 
Sump

So I have already started building my sump. I picked up a 40g breeder. Tank's back was already painted black, and it it was peeling and chipping so I scraped off the excess and repainted.

I would have preferred my sump to have a clear back, but I can't really complain because I got a great deal on it.

I have taken my design based on the Model F sump design on Melev's Reef.

I used glass baffles which I had cut at a local glass shop. The layout is as follows:

RO Storage => Intake Section => Bubble Trap => Return => Refugium

I also am installing a bubble tower in the intake section that will be filled with rubble rock to reduce excess micro bubbles (as done in Melev's design)

The RO storage section will house roughly 5 gallons and will be used for my auto-top system.

Instead of teeth in the refugium area I am going to use egg-crate. Approx 25% of the water flow from the overflows will flow in this area.

Here are a couple 3D layouts of the sump.

ISO_zps3c79adc2.jpg


Front_zpsc3d908bb.jpg
 
Sump

A couple pics to show the progress so far. I wish the pictures were a little better, but all I am using right now is my phone.

957C8A81-EB4C-4999-A169-98213E4B73CF-15915-000005C2603A4739.jpg


FDB35FF2-8FDD-48B4-ABE3-1622F52704AA-15915-000005C267A57772.jpg
 
Sump

I have all the baffles in place. Next I need to install the egg crate to the top of the Refugium section and make the bubble tower.

I have not decided if I am going to make the bubble tower out of glass or acrylic. I might go with glass and an egg crate bottom for the water to flow out of.

Heres a few more pics of all the baffles in place.

3D83DC38-8197-4034-9810-83ABB8C290AB-17268-0000064B8BC117C0.jpg


448CD272-C8D7-47E1-AE3C-53C9971DA236-17268-0000064C01C521FA.jpg
 
RO/DI Station

I picked up a Captive Purity 4 stage RO/DI unit with dual TDS Meter. I installed an ASOV to prevent any type of overflow. I am on well water in Plaistow and I was very shocked to find that my incoming TDS was only a hair over 100. I am getting 0 TDS out at the moment.

Right now I have one 20g Brute barrel set up for the RO/DI water with a drain on the front for ease of use. I plan on adding a second 20g Brute barrel for salt water mixing.

I only have the barrel sitting on a crate at the moment, but I plan on building a small stand to hold both barrels and get them higher off the ground for easier filling of barrels.

Heres a couple pics of the current setup and the float valve inside the barrel.

1C3DCB43-2063-41D0-8B69-34255805BC44-17268-0000064B7C62E5DE.jpg


52A03C76-9911-4F36-866D-A9214EDFCB1E-17268-0000064CE8120D91.jpg
 
Arduino Controller Build

So I started to order some parts for my Arduino controller. I basically just ordered the heart of the the controller so I can start playing around with it to get use to the programming. Once I get a handle on it I will order all the sensors I will need along with the misc parts to make everything nice and neat.

I talked briefly in my first post in what I was looking to do. After some thought I would leave the first first version to the below specs.

- Temp Monitoring
DT, Sump, Canopy
The heaters will be controlled by the DT temp, the sump will just be an extra monitor to distinguish the difference (If any) between the two. The Canopy temp sensor will control the on and off of the fans that will be located in the canopy. I will also have the lighting linked to the DT sensor to turn off if the tank temp becomes to high.

- Lighting Control
Simple on/off control feature. One to control the main lighting system, Second for the Refugium Lighting, and Third for the moonlights.

- Wave-maker
Simply On/Off oscillations between the associated pumps in the main tank.

- Feed Mode
Will turn off the circulation pumps in the DT for a certain period of time.

-Auto Top-Off
Based on a liquid level sensor in the sump, this will trigger the top off pump.

pH Monitoring
Display the pH of the tank on the main screen of the controller.

Here is a list of what I have coming:

- SainSmart Mega2560
- SainSmart Prototype Board
- Mini Breadboard
- SainSmart 16 channel relay module
- 128x64 Blue backlight LCD
- Power Supply

Sensor List:

- Waterproof Temp Sensors (QTY: 3)
- Real Time Clock Module
- Liquid Level Sensor
- pH Probe Kit

Future Possible Options:

- Constant Salinity Monitor
- Audible Alarm for when the Levels in the tank are off (Temp, pH, Salinity)
- RO Chamber water level indicator - To let me know from outside the tank that I need to refill my RO water
- Ethernet Shield to display all tank levels via a website for out of home monitoring
- Camera to be able to view tank action

The overall process I will update here but for the more detailed approach I plan on creating a separate thread to show the progress.
 
Subbed. Please keep us posted this one is going to very informative

I will be doing a separate thread for the controller build. I will just update overall status on this build thread. I will provide a link in this thread for it once i start it.
 
Sump

Well the sump is pretty much finished. I have the egg-crate in place on top of the baffle in the fuge area. I also decide instead of a bubble tower in the skimmer section that I would just put another baffle made out of egg-crate that I can fill with rubble and use to run my media.

Only thing I have left is to build a small stand for my skimmer so I can raise the height of the intake to be slightly over the water level.

7A5B7294-27DB-4005-B867-814871A3F10C-6032-0000023D84230AB5.jpg


EEF9AC39-3CC3-4769-96D0-9389DEFE7006-6032-0000023D8950E8C1.jpg


5D0C2142-9CE4-4ECB-AE35-B67E2E132A7B-6032-0000023D8EE40342.jpg
 
Sump

Finished the skimmer stand for the sump. I also made some egg-crate covers for the RO/DI chamber and the fuge chamber. For the moment I think my sump is completed.

Heres a few more pics:

A1D6E12B-E780-456F-A8E3-463A19CF9E84-7346-000002B089061978.jpg


BD5AB6C9-2CCC-406D-9816-B0CEB8FF0966-7346-000002B08E1D9263.jpg


603C6A91-CA51-490C-B1EA-CC77774A69A9-7346-000002B09438B267.jpg


EBE9F8B2-236A-4306-9DAA-24D0BED16988-7346-000002B09A1F4FAE.jpg


A4296A39-90B9-4688-B7C9-F64B85BA3806-7346-000002B09FC0DAC3.jpg
 
I finally was able to finish up my the room where the tank is going. Got the last bit of trim up and painted. Now I can really focus on getting the tank up and running.

I started working on the stand over the weekend. Since I am using a stock AGA stand, I wanted to dress it up just a little. I like the looks of the tanks that sit down inside the stand so the plastic trim on the tank can not be seen. I added a trim piece at the top to accomplish this.

9BA5969B-6EDD-4B4C-92A4-0960169051DD-16313-000007054E5D7ED1.jpg


This room sits right next to the kitchen. The kitchen has dark brown / espresso colored cabinets. The same goes for my dinner table and some other furniture in the adjacent rooms so I wanted the stand to match.

AA4779C6-35E0-4EFB-80A3-7DE89870EF96-16313-0000070557C59D82.jpg


F47397AF-2D74-417D-9472-0B069B0BF4DD-16313-000007055CEE23E3.jpg


All I need to do is finish the doors. I am hoping to get the tank in place and leveled this weekend and move on to the canopy.
 
Finished up the doors.

Next step is to level the stand, get the tank on, and start building the canopy.

A63F8B51-DA68-4249-BA10-E294AA089C81-20056-00000895391FED6A.jpg
 
So first thing I wanted to do today was go down in the crawl space below the room where the tank was going to check out the flooring situation.
As I was down there I got a very nice surprise, a previous owner had already added extra support in the area where my tank is going. Maybe they had something similar before me. What was already existing was what I had in mind for extra support. Saves me some time and money.

2D059A29-E9E5-441B-B099-9087B87C6C14-22435-0000097E599F9685_zps56a3fbc1.jpg
 
Back
Top