Corner Tank Build - 54 gallon

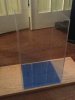
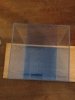
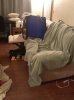
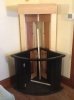
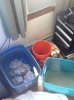
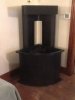
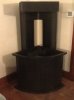
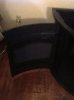
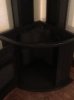
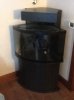
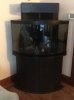
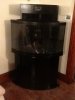
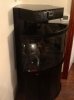
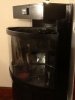
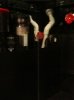
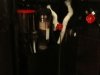
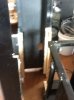
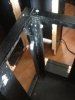
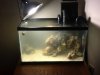
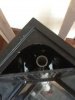
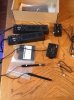
Okay so got the overflow installed by a experienced gracious member... Came out awesome! I also got a new toy, my controller with some extras included! I am currently working out the plumbing. I can't understand how one is expected to plumb this tank out the backside and under this stand. What a pain in the ....
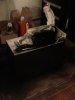
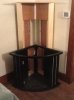
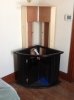
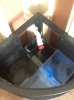
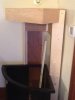
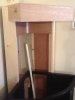
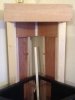
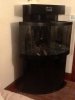
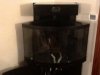
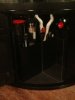
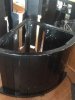
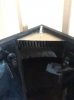
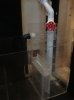
But have the main drain done and glued with gate valve in place. Need to finish the return and back up drain.

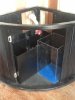
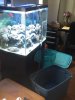
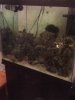
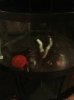
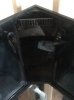
I am building a separate refugium next to the sump. My plan is to T the return and run a feed controlled with ball valve off the return line. I could also throm in a MJ and pump water into the ref... Last I can run my reactor return into the refugium... Any thoughts on this???


Sent from my iPad using Tapatalk HD
 

Attachments

  • ImageUploadedByTapatalk HD1340421192.681664.jpg
    ImageUploadedByTapatalk HD1340421192.681664.jpg
    66.3 KB · Views: 665
  • ImageUploadedByTapatalk HD1340421209.262550.jpg
    ImageUploadedByTapatalk HD1340421209.262550.jpg
    65 KB · Views: 650
  • ImageUploadedByTapatalk HD1340421224.950176.jpg
    ImageUploadedByTapatalk HD1340421224.950176.jpg
    60.8 KB · Views: 643
  • ImageUploadedByTapatalk HD1340421239.066613.jpg
    ImageUploadedByTapatalk HD1340421239.066613.jpg
    66 KB · Views: 644
  • ImageUploadedByTapatalk HD1340421252.925721.jpg
    ImageUploadedByTapatalk HD1340421252.925721.jpg
    60.9 KB · Views: 640
My plastic order came in... Now I need to build this refugium and hope it holds water, lol!


Sent from my iPad using Tapatalk HD
 

Attachments

  • ImageUploadedByTapatalk HD1340756010.148321.jpg
    ImageUploadedByTapatalk HD1340756010.148321.jpg
    51.7 KB · Views: 632
Got the refugium built... Came out pretty good, hopefully it holds water, lol... It is starting to come together, will have some good pics coming soon!


Sent from my iPad using Tapatalk HD
 

Attachments

  • ImageUploadedByTapatalk HD1340811085.222616.jpg
    ImageUploadedByTapatalk HD1340811085.222616.jpg
    62.5 KB · Views: 633
  • ImageUploadedByTapatalk HD1340811096.318066.jpg
    ImageUploadedByTapatalk HD1340811096.318066.jpg
    61.3 KB · Views: 632
Finished the sump, a few minor things to do with the refugium and will be set. I painted the outside of the sump and the two internal PVC pipes black with krylon. It hides allot of the imperfections from the heavy modifications done and will clean up the cluttered look when looking under the tank.
The frame has been almost finished. I have the box woodwork around the top section that will house my DIY Led light. Hopefully, will finish tomorrow night and get it painted. I was aiming to finish tomorrow but looks like I need a few more days.
I am making fresh water ATM and will be doing 2 large changes and saving the old water to help with the transfer.
All this work is being done with 2 power tools, all I own, jig saw and drill. And in my tiny 1 bedroom apartment. Not easy but making it work. I have totally shut down my living room, lol!


Sent from my iPad using Tapatalk HD
 
Here are the pics, more to come this weekend... Now that is a workshop, ha!


Sent from my iPad using Tapatalk HD
 

Attachments

  • ImageUploadedByTapatalk HD1341031460.893069.jpg
    ImageUploadedByTapatalk HD1341031460.893069.jpg
    58.7 KB · Views: 621
  • ImageUploadedByTapatalk HD1341032332.780759.jpg
    ImageUploadedByTapatalk HD1341032332.780759.jpg
    58.8 KB · Views: 621
  • ImageUploadedByTapatalk HD1341032341.849824.jpg
    ImageUploadedByTapatalk HD1341032341.849824.jpg
    58.9 KB · Views: 619
  • ImageUploadedByTapatalk HD1341032390.387954.jpg
    ImageUploadedByTapatalk HD1341032390.387954.jpg
    61.9 KB · Views: 621
  • ImageUploadedByTapatalk HD1341032400.704503.jpg
    ImageUploadedByTapatalk HD1341032400.704503.jpg
    63.9 KB · Views: 627
So here is my snug test fit of the home made refugium and the newly painted sump. I really like it, looks clean and is functional. I am currently working on a few braces and the final mounting of the plumbing and other pieces in the stand. I will be drilling the left face of the refugium and plumbing it to drain into the return. I am worried about bubbles by going direct into the return section... My reasoning was to allow the pods and such direct path to the DT. If anyone thinks it will be an issue, please let me know as I can drill it further down the side and drain into the skimmer section...?


Sent from my iPad using Tapatalk HD
 

Attachments

  • ImageUploadedByTapatalk HD1341120662.169086.jpg
    ImageUploadedByTapatalk HD1341120662.169086.jpg
    55.3 KB · Views: 607
  • ImageUploadedByTapatalk HD1341120680.170999.jpg
    ImageUploadedByTapatalk HD1341120680.170999.jpg
    58.1 KB · Views: 612
  • ImageUploadedByTapatalk HD1341120697.069437.jpg
    ImageUploadedByTapatalk HD1341120697.069437.jpg
    65.2 KB · Views: 609
Here is the last of the light and plumbing hiding addition. I am trying to decide on whether to add trim work or leave it square looking. When I get into the light build I will be adding some fan holes in the top and other braces and such up inside this box. It really has that fluval edge look I was going for all square so I held off on trimming it for now. I need to decide before I get started painting. Any opinions will help?


Sent from my iPad using Tapatalk HD
 

Attachments

  • ImageUploadedByTapatalk HD1341121014.971188.jpg
    ImageUploadedByTapatalk HD1341121014.971188.jpg
    56.7 KB · Views: 608
  • ImageUploadedByTapatalk HD1341121029.357973.jpg
    ImageUploadedByTapatalk HD1341121029.357973.jpg
    56.8 KB · Views: 603
  • ImageUploadedByTapatalk HD1341121040.704615.jpg
    ImageUploadedByTapatalk HD1341121040.704615.jpg
    56.8 KB · Views: 604
  • ImageUploadedByTapatalk HD1341121053.540367.jpg
    ImageUploadedByTapatalk HD1341121053.540367.jpg
    57.5 KB · Views: 600
So I started making large water changes today... The old water was filter through filter material and keep in Rubbermaid container that now has the dry rock I won from the meeting. I seeded it with a few pieces of rock from my tank. I used a little bit of the leftover new water to wash out the rocks. I will do this one more time before the switch and that should be all the water I will need...


Sent from my iPad using Tapatalk HD
 

Attachments

  • ImageUploadedByTapatalk HD1341459441.552420.jpg
    ImageUploadedByTapatalk HD1341459441.552420.jpg
    63.3 KB · Views: 592
  • ImageUploadedByTapatalk HD1341459452.974445.jpg
    ImageUploadedByTapatalk HD1341459452.974445.jpg
    64.5 KB · Views: 585
  • ImageUploadedByTapatalk HD1341459464.659158.jpg
    ImageUploadedByTapatalk HD1341459464.659158.jpg
    65.3 KB · Views: 586
  • ImageUploadedByTapatalk HD1341459474.338333.jpg
    ImageUploadedByTapatalk HD1341459474.338333.jpg
    62.2 KB · Views: 595
My stand is painted! Finally! I have one more touch up coat to do tomorrow. Then I need to figure out my fan placement and cut the fan holes. Either both on the top or one on each side creating push pull system...?
I lined the entire inside with sound/ vibration proof foam and spray. I am hoping this system will be super quiet when I am done with it! Getting there...


Sent from my iPad using Tapatalk HD
 

Attachments

  • ImageUploadedByTapatalk HD1341459717.058994.jpg
    ImageUploadedByTapatalk HD1341459717.058994.jpg
    57.6 KB · Views: 583
  • ImageUploadedByTapatalk HD1341459728.473869.jpg
    ImageUploadedByTapatalk HD1341459728.473869.jpg
    58.8 KB · Views: 577
  • ImageUploadedByTapatalk HD1341459737.888892.jpg
    ImageUploadedByTapatalk HD1341459737.888892.jpg
    59.3 KB · Views: 585
  • ImageUploadedByTapatalk HD1341459753.089868.jpg
    ImageUploadedByTapatalk HD1341459753.089868.jpg
    58.2 KB · Views: 589
Here is the new rock and what is left in my tank. By the looks of it I will have about 25lbs extra....


Sent from my iPad using Tapatalk HD
 

Attachments

  • ImageUploadedByTapatalk HD1341460005.770064.jpg
    ImageUploadedByTapatalk HD1341460005.770064.jpg
    60.9 KB · Views: 593
  • ImageUploadedByTapatalk HD1341460012.615502.jpg
    ImageUploadedByTapatalk HD1341460012.615502.jpg
    64.2 KB · Views: 584
Did a quick test fit... Starting to look like I envisioned it, getting there!


Sent from my iPad using Tapatalk HD
 

Attachments

  • ImageUploadedByTapatalk HD1341523838.012572.jpg
    ImageUploadedByTapatalk HD1341523838.012572.jpg
    57.9 KB · Views: 573
  • ImageUploadedByTapatalk HD1341523850.289718.jpg
    ImageUploadedByTapatalk HD1341523850.289718.jpg
    59.4 KB · Views: 569
Wanted to do a quick update regarding the project in whole: the remaining equipment has been purchased. I have 1 major investment left, 2 Tunze powerheads and the APC for my RKL. On its way are the last light upgrades from RapidLED. A black 20"x6" new heat sink with splash guard, a bunch of LEDS, and the new nano driver to control my accent colors. I also have an order from bulk reef supply containing a new Ehiem 3000 Compact, misc fittings, and the light dimmer mod for the RKL. I wiil say the investment has been well over $1K so far. I will look back and try to total it up at the end.

My next Phase was Phase 4: mainly the light design. The mounting plan (fan placement, attachment points, etc.) is still being planned. But the hardware has been settled upon: I will have 4 drivers in total:

Dimmable nano controller (700ma max) = 4 UV (Really violet), 4 Cyan, 2 Red - Dimmable ELN-60-48D (1300ma max) = 10 NW (4500k), 4 CW (6500k)... these 2 drivers will be wired together for power on the same cord. They will both plug into my ALC for the RKL to control a ramp up/ down to create the sunrise/ noon/ sunset effect.

LPC-60-1050 = 12 Royal Blue - LPC-35-700 = 4 Blue, 8 Royal Blue... these will also be wired together and will be constant power. I plan to have an actnic period 30mins before and after my light period. I am going constant on the blues and dimming the whites and colors to match. I have 2 ports of dimming control and this is my best option. I also own several LED for replacement or to try other combos... I have 12 CW, 2 red, 2 green, 4 WW all ready to use.

I ordered a small heatsink and will be doing a mini led refugium light. Probably 4 warm white LEDS.

To finish it off I have 2 lunar pods coming in with my new ALC that will represent true true lunar cycle. This setup will be as real as I can get it to nature. I tried to allow adaptability and replicate what goes on outside. It will all mount up inside that custom support I built and look very modern in design. I can not wait, exciting. My orders should both be in next week and I will be switching the tanks some point towards the end of the week...
 
PS... forgot to add, that will be 48 3watt LEDs to total = 144 watts over my 54 corner approx 6-8" above the water. I am due for the meter pretty soon and will post my PAR readings...
 
Really made some progress lately. Finished the painting, sound proofed the stand, and got my RKL face plate in place. I am waiting for my RapidLED order due tomorrow to upgrade and install my LED lights. I also have a bulk reef order with the ALC and return pump in it due tomorrow as well. That is all the equipment minus my new powerheads and ATO equipment I need.


Sent from my iPad using Tapatalk HD
 

Attachments

  • ImageUploadedByTapatalk HD1341806957.926436.jpg
    ImageUploadedByTapatalk HD1341806957.926436.jpg
    55.7 KB · Views: 551
  • ImageUploadedByTapatalk HD1341806968.873636.jpg
    ImageUploadedByTapatalk HD1341806968.873636.jpg
    55.5 KB · Views: 538
  • ImageUploadedByTapatalk HD1341806978.925718.jpg
    ImageUploadedByTapatalk HD1341806978.925718.jpg
    55.9 KB · Views: 544
  • ImageUploadedByTapatalk HD1341806989.142852.jpg
    ImageUploadedByTapatalk HD1341806989.142852.jpg
    56.1 KB · Views: 537
  • ImageUploadedByTapatalk HD1341806997.524464.jpg
    ImageUploadedByTapatalk HD1341806997.524464.jpg
    52.7 KB · Views: 545
Here's the sump/ refugium design. I have mostly everything installed... Still need my DIY refugium light and return pump and line put in place. The return will T off to that gate valve above the refugium where I can control the flow. I went with an Ehiem compact 3000 return pump.
I also have both drains into the sump. The dry backup goes into the return. I want this to be loud and noticeable if it has flow. That means something is wrong on main drain. The main drain is controlled on the gate valve in the center back area. This drains into that tall section that will be filled with rock rubble. I really like how everything matches. Totally not planned but looks pretty cool. I did paint some of the pipe work black. I am hoping to make the switch soon. Need to plan and build some rock work pieces. And upgrade the light.


Sent from my iPad using Tapatalk HD
 

Attachments

  • ImageUploadedByTapatalk HD1341807199.886215.jpg
    ImageUploadedByTapatalk HD1341807199.886215.jpg
    53.4 KB · Views: 545
  • ImageUploadedByTapatalk HD1341807211.834843.jpg
    ImageUploadedByTapatalk HD1341807211.834843.jpg
    52.6 KB · Views: 540
  • ImageUploadedByTapatalk HD1341807218.871716.jpg
    ImageUploadedByTapatalk HD1341807218.871716.jpg
    52.2 KB · Views: 533
  • ImageUploadedByTapatalk HD1341807226.661733.jpg
    ImageUploadedByTapatalk HD1341807226.661733.jpg
    52.6 KB · Views: 528
One decision I can't make is whether to put a DSB in the refugium or just have rock... I have read good and bad on both methods. I will have a very shallow sand bed in the DT...


Sent from my iPad using Tapatalk HD
 
So to close this out... I had a leak via small crack in sump. Didn't see the water running underneath the stand until my landlord started screaming from the cellar. Long story short the tank had to go... Being built inside made it impossible to remove. After long struggle here it is in all it's glory, ready to leave in 2 pieces. Blood, sweat, and allot of tears = Empty wallet
Big thanks to MrX for the help...

Sent from my iPad using Tapatalk HD
 

Attachments

  • ImageUploadedByTapatalk HD1343354736.862530.jpg
    ImageUploadedByTapatalk HD1343354736.862530.jpg
    68.5 KB · Views: 504
  • ImageUploadedByTapatalk HD1343354756.994808.jpg
    ImageUploadedByTapatalk HD1343354756.994808.jpg
    65.6 KB · Views: 502
  • ImageUploadedByTapatalk HD1343354769.110568.jpg
    ImageUploadedByTapatalk HD1343354769.110568.jpg
    66.4 KB · Views: 505
And here is my finished setup! Lol


Sent from my iPad using Tapatalk HD
 

Attachments

  • ImageUploadedByTapatalk HD1343355076.125595.jpg
    ImageUploadedByTapatalk HD1343355076.125595.jpg
    53.8 KB · Views: 504
Back
Top